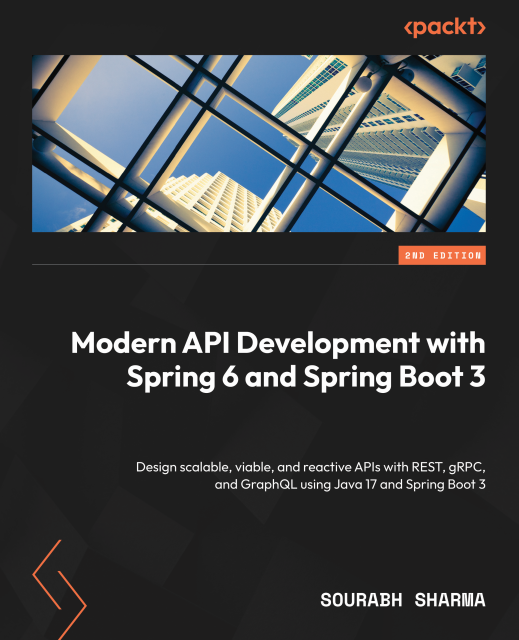
New Book Day: Modern API Development with Spring 6 and Spring Boot 3

The holiday season is close and it is time to resume and enhance my reading backlog. I wanted to get a break from infrastructure related topics and revisit some of my Spring REST API days.
I picked this book and it is a real treat. It focuses mainly on REST APIs but includes GRPC as well as GraphQL.
Obviously APIs are not anymore a hot topic but an essential topic. Unless you live under a rock, your daily work includes integrating with an API or involves something that integrates with an API.
You start with designing a REST API using the OpenAPI specification and then work towards the implementation of the REST API.
Then the book proceeds smoothly on consuming the API by implementing a front-end application, testing the API, containerising it, deploying it as well as monitoring it. This gives an end-to-end experience on implementing REST APIs with Spring.

As expected the essential topics such as security, JWT, HateOAS, database integrations, REST API best practices, testing and deploying to prod are covered. While going through the topics, I liked the opportunities the author gave to get back to the basics. There is a focus on designing REST APIs but for each technical aspect involved there is a deep dive like learning more on Spring, IoC containers, annotations, configuration modularisation, JPA as well as key components of Spring that help towards a REST API implementation.
Apart from that the book does not stick only to REST API implementation thus GraphQL and gRPC are also included.

For me a winner is the extras that come with the book
For example you get to use project Reactor and Webflux. Flyway for DB migrations is also included. Monitoring using the ELK stack is also included. Let alone that you get to integrate with Kubernetes using minikube.
Overall this book is complete and whether you are a seasoned professional or you get started with APIs in Spring, it’s a solid source of information.

In the next version it would be awesome to see topics such as rate limiting, mTLS, rest client implementation practises and a TDD approach on the examples.

Shoutout to Sourabh Sharma. Thank you for this book!

Spring Webflux Retries

If you use Spring Webflux you probably want your requests to be more resilient. In this case we can just use the retries that come packaged with the Webflux library.
There are various cases that we can take into account:

  • too many requests to the server
  • an internal server error
  • unexpected format
  • server timeout

We would make a test case for those using MockWebServer.

We shall add the WebFlux and the MockWebServer to a project:

        <dependency>
            <groupId>org.springframework.boot</groupId>
            <artifactId>spring-boot-starter-webflux</artifactId>
            <version>2.7.15</version>
        </dependency>

        <dependency>
            <groupId>com.squareup.okhttp3</groupId>
            <artifactId>mockwebserver</artifactId>
            <version>4.11.0</version>
            <scope>test</scope>
        </dependency>
        <dependency>
            <groupId>io.projectreactor</groupId>
            <artifactId>reactor-test</artifactId>
            <scope>test</scope>
            <version>3.5.9</version>
        </dependency>

Let’s check the scenario of too many requests on the server. In this scenario our request fails because the server will not fulfil it. The server is still functional however and on another request, chances are we shall receive a proper response.

import okhttp3.mockwebserver.MockResponse;
import okhttp3.mockwebserver.MockWebServer;
import okhttp3.mockwebserver.SocketPolicy;
import org.junit.jupiter.api.Test;
import org.springframework.web.reactive.function.client.WebClient;
import reactor.core.publisher.Mono;
import reactor.test.StepVerifier;

import java.io.IOException;
import java.time.Duration;
import java.util.concurrent.TimeUnit;

class WebFluxRetry {

    @Test
    void testTooManyRequests() throws IOException {
        MockWebServer server = new MockWebServer();
        MockResponse tooManyRequests = new MockResponse()
                .setBody("Too Many Requests")
                .setResponseCode(429);
        MockResponse successfulRequests = new MockResponse()
                .setBody("successful");

        server.enqueue(tooManyRequests);
        server.enqueue(tooManyRequests);
        server.enqueue(successfulRequests);
        server.start();

        WebClient webClient = WebClient.builder()
                .baseUrl("http://" + server.getHostName() + ":" + server.getPort())
                .build();

        Mono<String> result = webClient.get()
                .retrieve()
                .bodyToMono(String.class)
                .retry(2);

        StepVerifier.create(result)
                .expectNextMatches(s -> s.equals("successful"))
                .verifyComplete();

        server.shutdown();
    }
}

We used mock server in order to enqueue requests. Essentially the requests we placed on the mock server will be enqueued and consumed every time we do a request. The first two responses would be failed 429 responses from the server.

Let’s check the case of 5xx responses. A 5xx can be caused by various reasons. Usually if we face a 5xx probably there is a problem in the server codebase. However in some cases 5xx might come as a result of an unstable service that regularly restarts, also a server might be deployed in an availability zone that faces network issues, it can even be a failed rollout which is not fully in effect. In this case a retry makes sense. By retrying, the request will be routed to the next server behind the load balancer.
What we shall try a request that has a bad status:

    @Test
    void test5xxResponse() throws IOException {
        MockWebServer server = new MockWebServer();
        MockResponse tooManyRequests = new MockResponse()
                .setBody("Server Error")
                .setResponseCode(500);
        MockResponse successfulRequests = new MockResponse()
                .setBody("successful");

        server.enqueue(tooManyRequests);
        server.enqueue(tooManyRequests);
        server.enqueue(successfulRequests);
        server.start();

        WebClient webClient = WebClient.builder()
                .baseUrl("http://" + server.getHostName() + ":" + server.getPort())
                .build();

        Mono<String> result = webClient.get()
                .retrieve()
                .bodyToMono(String.class)
                .retry(2);

        StepVerifier.create(result)
                .expectNextMatches(s -> s.equals("successful"))
                .verifyComplete();

        server.shutdown();
    }

Also a response with a wrong format is possible to happen if an application goes haywire:

    @Data
    @AllArgsConstructor
    @NoArgsConstructor
    private static class UsernameResponse {
        private String username;
    }

    @Test
    void badFormat() throws IOException {
        MockWebServer server = new MockWebServer();
        MockResponse tooManyRequests = new MockResponse()
                .setBody("Plain text");
        MockResponse successfulRequests = new MockResponse()
                .setBody("{\"username\":\"test\"}")
                .setHeader("Content-Type","application/json");

        server.enqueue(tooManyRequests);
        server.enqueue(tooManyRequests);
        server.enqueue(successfulRequests);
        server.start();

        WebClient webClient = WebClient.builder()
                .baseUrl("http://" + server.getHostName() + ":" + server.getPort())
                .build();

        Mono<UsernameResponse> result = webClient.get()
                .retrieve()
                .bodyToMono(UsernameResponse.class)
                .retry(2);

        StepVerifier.create(result)
                .expectNextMatches(s -> s.getUsername().equals("test"))
                .verifyComplete();

        server.shutdown();
    }

If we break it down we created two responses with plain text format. Those responses would be rejected since they cannot be mapped to the UsernameResponse object. Thanks to the retries we managed to get a successful response.

Our last request would tackle the case of a timeout:

    @Test
    void badTimeout() throws IOException {
        MockWebServer server = new MockWebServer();
        MockResponse dealayedResponse= new MockResponse()
                .setBody("Plain text")
                .setSocketPolicy(SocketPolicy.DISCONNECT_DURING_RESPONSE_BODY)
                .setBodyDelay(10000, TimeUnit.MILLISECONDS);
        MockResponse successfulRequests = new MockResponse()
                .setBody("successful");

        server.enqueue(dealayedResponse);
        server.enqueue(successfulRequests);
        server.start();

        WebClient webClient = WebClient.builder()
                .baseUrl("http://" + server.getHostName() + ":" + server.getPort())
                .build();

        Mono<String> result = webClient.get()
                .retrieve()
                .bodyToMono(String.class)
                .timeout(Duration.ofMillis(5_000))
                .retry(1);

        StepVerifier.create(result)
                .expectNextMatches(s -> s.equals("successful"))
                .verifyComplete();

        server.shutdown();
    }

That’s it, thanks to retries our codebase was able to recover from failures and become more resilient. Also we used MockWebServer which can be very handy for simulating these scenarios.

Add ZipKin to your Spring application

If your application contains multiple services interacting with each other the need for distributed tracing is increasing. You have a call towards one application that also calls another application, in certain cases the application to be accessed next might be a different one. You need to trace the request end to end and identify what happened to the call.
Zipkin is a Distributed Tracing system. Essentially by using Zipkin on our system we can track how a call spans across various Microservices.

ZipKin comes with Various database options. In our case we shall use Elasticsearch.

We will setup out ZipKin server using Compose

Let’s start with our Compose file:

services:
  redis:
    image: redis
    ports:
      - 6379:6379
  elasticsearch:
    image: elasticsearch:7.17.7
    ports:
      - 9200:9200
      - 9300:9300
    healthcheck:
      test: ["CMD", "curl", "-f", "http://localhost:9200/_cat/health"]
      interval: 20s
      timeout: 10s
      retries: 5
      start_period: 5s
    environment:
      - discovery.type=single-node
    restart: always
  zipkin:
    image: openzipkin/zipkin-slim
    ports:
      - 9411:9411
    environment:
      - STORAGE_TYPE=elasticsearch
      - ES_HOSTS=http://elasticsearch:9200
      - JAVA_OPTS=-Xms1G -Xmx1G -XX:+ExitOnOutOfMemoryError
    depends_on:
      - elasticsearch
    restart: always

We can run the above using

docker compose up

You can find more on Compose on the Developers Essential Guide to Docker Compose.

Let’s build our applications, our applications will be servlet based

We shall use a service for locations, this service essentially will persist locations on a Redis database using the GeoHash data structure.
You can find the service implementation on a previous blog.

We would like to add some extra dependencies so that Zipkin integration is possible.

...
    <dependencyManagement>
        <dependencies>
            <dependency>
                <groupId>org.springframework.cloud</groupId>
                <artifactId>spring-cloud-dependencies</artifactId>
                <version>2021.0.5</version>
                <type>pom</type>
                <scope>import</scope>
            </dependency>
        </dependencies>
    </dependencyManagement>
...
        <dependency>
            <groupId>org.springframework.cloud</groupId>
            <artifactId>spring-cloud-starter-sleuth</artifactId>
        </dependency>
        <dependency>
            <groupId>org.springframework.cloud</groupId>
            <artifactId>spring-cloud-sleuth-zipkin</artifactId>
        </dependency>
...

Spring Sleuth provides distributed tracing to our Spring application. By using spring Sleuth tracing data are generated. In case of a servlet filter or a rest template tracing data will also be generated. Provided the Zipkin binary is included the data generated will be dispatched to the Zipkin collector specified using
spring.zipkin.baseUrl.

Let’s also make our entry point application. This application will execute requests towards the location service we implemented previously.
The dependencies will be the following.

<?xml version="1.0" encoding="UTF-8"?>
<project xmlns="http://maven.apache.org/POM/4.0.0"
         xmlns:xsi="http://www.w3.org/2001/XMLSchema-instance"
         xsi:schemaLocation="http://maven.apache.org/POM/4.0.0 http://maven.apache.org/xsd/maven-4.0.0.xsd">
    <groupId>org.example</groupId>
    <version>1.0-SNAPSHOT</version>
    <modelVersion>4.0.0</modelVersion>

    <artifactId>european-venue</artifactId>

    <properties>
        <maven.compiler.source>11</maven.compiler.source>
        <maven.compiler.target>11</maven.compiler.target>
        <project.build.sourceEncoding>UTF-8</project.build.sourceEncoding>
    </properties>

    <dependencyManagement>
        <dependencies>
            <dependency>
                <groupId>org.springframework.cloud</groupId>
                <artifactId>spring-cloud-dependencies</artifactId>
                <version>2021.0.5</version>
                <type>pom</type>
                <scope>import</scope>
            </dependency>
        </dependencies>
    </dependencyManagement>

    <dependencies>
        <dependency>
            <groupId>org.springframework.boot</groupId>
            <artifactId>spring-boot-starter-web</artifactId>
            <version>2.7.5</version>
        </dependency>
        <dependency>
            <groupId>io.projectreactor</groupId>
            <artifactId>reactor-core</artifactId>
            <version>3.5.0</version>
        </dependency>
        <dependency>
            <groupId>org.projectlombok</groupId>
            <artifactId>lombok</artifactId>
            <version>1.18.24</version>
            <scope>provided</scope>
        </dependency>
        <dependency>
            <groupId>org.springframework.cloud</groupId>
            <artifactId>spring-cloud-starter-sleuth</artifactId>
        </dependency>
        <dependency>
            <groupId>org.springframework.cloud</groupId>
            <artifactId>spring-cloud-sleuth-zipkin</artifactId>
        </dependency>
    </dependencies>

</project>

We shall create a service interacting with the location service.

The location model shall be the same:

package org.landing;

import lombok.Data;

@Data
public class Location {

    private String name;
    private Double lat;
    private Double lng;

}

And the service:

package org.landing;

import org.springframework.beans.factory.annotation.Autowired;
import org.springframework.beans.factory.annotation.Value;
import org.springframework.stereotype.Service;
import org.springframework.web.client.RestTemplate;


@Service
public class LocationService {

    @Autowired
    private RestTemplate restTemplate;

    @Value("${location.endpoint}")
    private String locationEndpoint;

    public void checkIn(Location location) {
        restTemplate.postForLocation(locationEndpoint, location);
    }

}

Following we will add the controller:

package org.landing;

import org.springframework.http.ResponseEntity;
import org.springframework.web.bind.annotation.PostMapping;
import org.springframework.web.bind.annotation.RequestBody;
import org.springframework.web.bind.annotation.RestController;

import lombok.AllArgsConstructor;

@RestController
@AllArgsConstructor
public class CheckinController {

    private final LocationService locationService;

    @PostMapping("/checkIn")
    public ResponseEntity<String> checkIn(@RequestBody Location location) {
        locationService.checkIn(location);
        return ResponseEntity.ok("Success");
    }

}

We need also RestTemplate to be configured:

package org.landing;

import org.springframework.context.annotation.Bean;
import org.springframework.context.annotation.Configuration;
import org.springframework.web.client.RestTemplate;

@Configuration
public class RestTemplateConfiguration {

    @Bean
    public RestTemplate restTemplate() {
        return new RestTemplate();
    }

}

Last but not least the main method:

package org.location;

import org.springframework.boot.SpringApplication;
import org.springframework.boot.autoconfigure.SpringBootApplication;

@SpringBootApplication
public class LocationApplication {

    public static void main(String[] args) {
        SpringApplication.run(LocationApplication.class);
    }

}

Now that everything is up and running let’s put this into action

curl --location --request POST 'localhost:8081/checkIn/' \
--header 'Content-Type: application/json' \
--data-raw '{
	"name":"Liverpool Street",
	"lat": 51.517336,
	"lng": -0.082966
}'
> Success

Let’s navigate now to the Zipkin Dashboard and search traces for the european-venue.
By expanding the calls we shall end up to a call like this.

Essentially we have an end to end tracing for our applications. We can see the entry point which is the european-venue checkin endpoint.
Also because the location service is called we have data points for the call received. However we also see data points for the call towards the redis database.
Essentially by adding sleuth to our application, beans that are ingress and egress points are being wrapped so that trace data can be reported.

You can find the code on GitHub.
Add Grpc to your Spring Application

On the previous example we had a Java application spinning up an http server and upon this Java process operating a GRPC application.

If you use frameworks like Spring you might wonder how you can achieve a Grpc and Spring integration.
There are libraries out there that do so, we shall use the grpc-spring-boot-starter from io.github.lognet.
We shall start with the dependencies. We do need to import the gRPC generating plugins we used on the previous example.

    <dependencies>
        <dependency>
            <groupId>io.github.lognet</groupId>
            <artifactId>grpc-spring-boot-starter</artifactId>
            <version4.5.8</version>
        </dependency>
    </dependencies>


    <build>
        <extensions>
            <extension>
                <groupId>kr.motd.maven</groupId>
                <artifactId>os-maven-plugin</artifactId>
                <version>1.6.2</version>
            </extension>
        </extensions>
        <plugins>
            <plugin>
                <groupId>org.xolstice.maven.plugins</groupId>
                <artifactId>protobuf-maven-plugin</artifactId>
                <version>0.6.1</version>
                <configuration>
                    <protocArtifact>com.google.protobuf:protoc:3.17.2:exe:${os.detected.classifier}</protocArtifact>
                    <pluginId>grpc-java</pluginId>
                    <pluginArtifact>io.grpc:protoc-gen-grpc-java:1.39.0:exe:${os.detected.classifier}</pluginArtifact>
                </configuration>
                <executions>
                    <execution>
                        <goals>
                            <goal>compile</goal>
                            <goal>compile-custom</goal>
                        </goals>
                    </execution>
                </executions>
            </plugin>
        </plugins>
    </build>

What happens behind the scenes.

  • Spring environment spins up
  • gRPC Server starts
  • Spring services annotated with @GRpcService are picked up and registered to the gRPC server
  • Security and other filtering based components are integrated with the equivalent gRPC ServerInterceptor.

So pretty much we expect that instead of controllers we shall have GRpcServices and ServerInterceptors for filters.

Let’s add the proto files. We shall use the same proto of the previous example.

The location is src/main/proto/Order.proto and the contents would be

syntax = "proto3";
 
option java_multiple_files = true;
option java_package = "com.egkatzioura.order.v1";
 
service OrderService {
    rpc ExecuteOrder(OrderRequest) returns (OrderResponse) {};
}
 
message OrderRequest {
    string email = 1;
    string product = 2;
    int32 amount = 3;
}
 
message OrderResponse {
    string info = 1;
}

As expected an mvn clean install will generate the gRPC classes. Now we should create the spring service.

package com.gkatzioura.order.impl;

import com.egkatzioura.order.v1.OrderRequest;
import com.egkatzioura.order.v1.OrderResponse;
import com.egkatzioura.order.v1.OrderServiceGrpc;
import io.grpc.stub.StreamObserver;
import org.lognet.springboot.grpc.GRpcService;

@GRpcService
public class OrderServiceImpl extends OrderServiceGrpc.OrderServiceImplBase{

    @Override
    public void executeOrder(OrderRequest request, StreamObserver<OrderResponse> responseObserver) {
        OrderResponse response = OrderResponse.newBuilder()
                .setInfo("Hi "+request.getEmail()+", you order has been executed")
                .build();

        responseObserver.onNext(response);
        responseObserver.onCompleted();
    }

}

Also let’s add the main class

package com.gkatzioura.order;

import org.springframework.boot.SpringApplication;
import org.springframework.boot.autoconfigure.SpringBootApplication;

@SpringBootApplication
public class Application {

    public static void main(String[] args) {
        SpringApplication.run(Application.class, args);
    }
    
}

The Spring context is spun up, and the @GRpcService annotated services kick off.
By default the port would be 6565

Let’s run the same client that we run on the previous example.

package com.gkatzioura.order;

import com.egkatzioura.order.v1.Order;
import com.egkatzioura.order.v1.OrderRequest;
import com.egkatzioura.order.v1.OrderResponse;
import com.egkatzioura.order.v1.OrderServiceGrpc;
import io.grpc.ManagedChannel;
import io.grpc.ManagedChannelBuilder;

public class ApplicationClient {
    public static void main(String[] args) {
        ManagedChannel managedChannel = ManagedChannelBuilder.forAddress("localhost", 6565)
                .usePlaintext()
                .build();

        OrderServiceGrpc.OrderServiceBlockingStub orderServiceBlockingStub
                = OrderServiceGrpc.newBlockingStub(managedChannel);

        OrderRequest orderRequest = OrderRequest.newBuilder()
                .setEmail("hello@word.com")
                .setProduct("no-name")
                .setAmount(3)
                .build();

        OrderResponse orderResponse = orderServiceBlockingStub.executeOrder(orderRequest);

        System.out.println("Received response: "+orderResponse.getInfo());

        managedChannel.shutdown();
    }
}

The response is the one expected. We did connect to the server and got back a response. We did not have to manually register the services to the gRPC server, since spring did this one for us. You can find the code on github.

Executing Blocking calls on a Reactor based Application

Project Reactor is a fully non-blocking foundation with back-pressure support included. Although most libraries out there support asynchronous methods thus assist on its usage, there are some cases where a library contains complex blocking methods without an asynchronous implementation. Calling this methods inside a reactor stream would have bad results. Instead we need to make those method to async ones or find if there is a workaround.

Provided you might be short on time and is not possible to contribute a patch to the tool used, or you cannot identify how to reverse engineer the blocking call and implement a non blocking version, then it makes sense to utilise some threads.

First let’s import the dependencies for our project

    <dependencyManagement>
        <dependencies>
            <dependency>
                <groupId>io.projectreactor</groupId>
                <artifactId>reactor-bom</artifactId>
                <version>2020.0.11</version>
                <type>pom</type>
                <scope>import</scope>
            </dependency>
        </dependencies>
    </dependencyManagement>

    <dependencies>
        <dependency>
            <groupId>io.projectreactor</groupId>
            <artifactId>reactor-core</artifactId>
        </dependency>
        <dependency>
            <groupId>io.projectreactor</groupId>
            <artifactId>reactor-test</artifactId>
            <scope>test</scope>
        </dependency>
        <dependency>
            <groupId>org.junit.jupiter</groupId>
            <artifactId>junit-jupiter-engine</artifactId>
            <version>5.8.1</version>
            <scope>test</scope>
        </dependency>
    </dependencies>

Let’s start with out blocking service

    public String get(String url) throws IOException {
        HttpURLConnection connection = (HttpsURLConnection) new URL(url).openConnection();
        connection.setRequestMethod("GET");
        connection.setDoOutput(true);
        try(InputStream inputStream = connection.getInputStream()) {
            return new String(inputStream.readAllBytes(), StandardCharsets.UTF_8);
        }
    }

We used HttpsURLConnection since we know for sure that it is a blocking call. To do so we need a Scheduler. For the blocking calls we shall use the boundedElastic scheduler. A scheduler can also be created by an existing executor service.

So let’s transform this method to a non-blocking one.

package com.gkatzioura.blocking;

import reactor.core.publisher.Mono;
import reactor.core.scheduler.Schedulers;

public class BlockingAsyncService {

    private final BlockingService blockingService;

    public BlockingAsyncService(BlockingService blockingService) {
        this.blockingService = blockingService;
    }

    private Mono<String> get(String url) {
        return Mono.fromCallable(() -> blockingService.get(url))
                .subscribeOn(Schedulers.boundedElastic());
    }

}

What we can see is a Mono created from the callable method. A scheduler subscribes to this mono and thus will receive the event emitted, which shall be scheduled for execution.

Let’s have a test

package com.gkatzioura.blocking;

import org.junit.jupiter.api.BeforeEach;
import org.junit.jupiter.api.Test;

import reactor.core.publisher.Mono;
import reactor.test.StepVerifier;

class BlockingAsyncServiceTest {

    private BlockingAsyncService blockingAsyncService;

    @BeforeEach
    void setUp() {
        blockingAsyncService = new BlockingAsyncService(new BlockingService());
    }

    @Test
    void name() {
        StepVerifier.create(
                            Mono.just("https://www.google.com/")
                                .map(s -> blockingAsyncService.get(s))
                                .flatMap(s -> s)
                    )
                .consumeNextWith(s -> s.startsWith("<!doctype"))
                .verifyComplete();
    }
}

That’s it! Obviously the best thing to do is to find a way to make this blocking call into an async call and try to find a workaround using the async libraries out there. When it’s not feasible we can fallback on using Threads.

Receive Pub/Sub messages to your Spring Application

Pub/Sub is a messaging solution provided by GCP

Before we dive into the actual configuration we need to be aware that Spring Cloud for GCP is now managed by the Google Cloud Team. Therefore the latest code can be found here.

Our application will receive messages from Pub/Sub and expose them using an endpoint.
Let’s go for the imports first

<?xml version="1.0" encoding="UTF-8"?>
<project xmlns="http://maven.apache.org/POM/4.0.0"
         xmlns:xsi="http://www.w3.org/2001/XMLSchema-instance"
         xsi:schemaLocation="http://maven.apache.org/POM/4.0.0 http://maven.apache.org/xsd/maven-4.0.0.xsd">
    <modelVersion>4.0.0</modelVersion>

    <groupId>com.gkatzioura</groupId>
    <artifactId>spring-cloud-pubsub-example</artifactId>
    <version>1.0-SNAPSHOT</version>

    <parent>
        <groupId>org.springframework.boot</groupId>
        <artifactId>spring-boot-starter-parent</artifactId>
        <version>2.4.1</version>
        <relativePath/>
    </parent>

    <properties>
        <maven.compiler.source>11</maven.compiler.source>
        <maven.compiler.target>11</maven.compiler.target>
    </properties>

    <dependencyManagement>
        <dependencies>
            <dependency>
                <groupId>com.google.cloud</groupId>
                <artifactId>spring-cloud-gcp-dependencies</artifactId>
                <version>2.0.4</version>
                <type>pom</type>
                <scope>import</scope>
            </dependency>
        </dependencies>
    </dependencyManagement>

    <dependencies>
        <dependency>
            <groupId>org.springframework.boot</groupId>
            <artifactId>spring-boot-starter-web</artifactId>
        </dependency>
        <dependency>
            <groupId>com.google.cloud</groupId>
            <artifactId>spring-cloud-gcp-pubsub</artifactId>
        </dependency>
        <dependency>
            <groupId>com.google.cloud</groupId>
            <artifactId>spring-cloud-gcp-autoconfigure</artifactId>
        </dependency>

        <dependency>
            <groupId>org.springframework.integration</groupId>
            <artifactId>spring-integration-core</artifactId>
        </dependency>
    </dependencies>

</project>

Quick note: with a few tweaks you can use the PubSub emulator available from the Google Cloud Team.

The first class will contain the Pub/Sub messages received. It will be a queue containing a limited number of messages.

package com.gkatzioura.pubsub.example;

import java.util.concurrent.LinkedBlockingQueue;

import org.springframework.stereotype.Component;

@Component
public class LatestUpdates {

    LinkedBlockingQueue<String> boundedQueue = new LinkedBlockingQueue<>(100);

    public void addUpdate(String update) {
        boundedQueue.add(update);
    }

    public String fetch() {
        return boundedQueue.poll();
    }

}

The Pub/Sub configuration will initiate the listener, plus shall use spring integration.

We define a message channel.

    @Bean
    public MessageChannel pubsubInputChannel() {
        return new DirectChannel();
    }

Then add the inbound channel adapter The ack mode will be set to manual.

    @Bean
    public PubSubInboundChannelAdapter messageChannelAdapter(
            @Qualifier("pubsubInputChannel") MessageChannel inputChannel,
            PubSubTemplate pubSubTemplate) {
        PubSubInboundChannelAdapter adapter =
                new PubSubInboundChannelAdapter(pubSubTemplate, "your-subscription");
        adapter.setOutputChannel(inputChannel);
        adapter.setAckMode(AckMode.MANUAL);
        adapter.setPayloadType(String.class);
        return adapter;
    }

Then we add a listener method. The way acknowledgements are handled is up to the developer. If a exception occurs on that block it will be caught and send on an error stream. Therefore messages will continue to get pulled.

    @ServiceActivator(inputChannel = "pubsubInputChannel")
    public void messageReceiver(String payload,
                                @Header(GcpPubSubHeaders.ORIGINAL_MESSAGE) BasicAcknowledgeablePubsubMessage message) {
        latestUpdates.addUpdate(message.getPubsubMessage().getData().toStringUtf8());
        message.ack();
    }

The entire Pub/Sub configuration

package com.gkatzioura.pubsub.example;

import org.springframework.beans.factory.annotation.Qualifier;
import org.springframework.context.annotation.Bean;
import org.springframework.context.annotation.Configuration;
import org.springframework.integration.annotation.ServiceActivator;
import org.springframework.integration.channel.DirectChannel;
import org.springframework.messaging.MessageChannel;
import org.springframework.messaging.handler.annotation.Header;

import com.google.cloud.spring.pubsub.core.PubSubTemplate;
import com.google.cloud.spring.pubsub.integration.AckMode;
import com.google.cloud.spring.pubsub.integration.inbound.PubSubInboundChannelAdapter;
import com.google.cloud.spring.pubsub.support.BasicAcknowledgeablePubsubMessage;
import com.google.cloud.spring.pubsub.support.GcpPubSubHeaders;

@Configuration
public class PubSubConfiguration {

    private final LatestUpdates latestUpdates;

    public PubSubConfiguration(LatestUpdates latestUpdates) {
        this.latestUpdates = latestUpdates;
    }

    @Bean
    public MessageChannel pubsubInputChannel() {
        return new DirectChannel();
    }

    @Bean
    public PubSubInboundChannelAdapter messageChannelAdapter(
            @Qualifier("pubsubInputChannel") MessageChannel inputChannel,
            PubSubTemplate pubSubTemplate) {
        PubSubInboundChannelAdapter adapter =
                new PubSubInboundChannelAdapter(pubSubTemplate, "your-subscription");
        adapter.setOutputChannel(inputChannel);
        adapter.setAckMode(AckMode.MANUAL);
        adapter.setPayloadType(String.class);
        return adapter;
    }

    @ServiceActivator(inputChannel = "pubsubInputChannel")
    public void messageReceiver(String payload,
                                @Header(GcpPubSubHeaders.ORIGINAL_MESSAGE) BasicAcknowledgeablePubsubMessage message) {
        latestUpdates.addUpdate(message.getPubsubMessage().getData().toStringUtf8());
        message.ack();
    }

}

The controller will just pull from the internal Queue.

package com.gkatzioura.pubsub.example;

import org.springframework.web.bind.annotation.GetMapping;
import org.springframework.web.bind.annotation.RestController;

@RestController
public class UpdatesController {

    private LatestUpdates latestUpdates;

    public UpdatesController(LatestUpdates latestUpdates) {
        this.latestUpdates = latestUpdates;
    }

    @GetMapping("/update")
    public String getLatestUpdate() {
        return latestUpdates.fetch();
    }

}

Next step is to define an application for Spring

package com.gkatzioura.pubsub.example;

import org.springframework.boot.SpringApplication;
import org.springframework.boot.autoconfigure.SpringBootApplication;

@SpringBootApplication
public class ExampleApplication {


    public static void main(String[] args) {
        SpringApplication.run(ExampleApplication.class, args);
    }

}

By running the application be aware that you need to have at least one env variable set

spring.cloud.gcp.pubsub.enabled=true

This will fallback to your Local GCP configuration and will identify your credentials as well as the project pointing at.

That’s it! To summarise, we achieved to pull messages from Pub/Sub and expose them on an endpoint.

Using R2DBC with a Reactor Application

Since Reactor has taken over the Java world it was inevitable the a reactive sql library would be there.
In this blog we shall use r2dbc with h2 and reactor.

We shall start with the dependencies needed.

<?xml version="1.0" encoding="UTF-8"?>
<project xmlns="http://maven.apache.org/POM/4.0.0"
         xmlns:xsi="http://www.w3.org/2001/XMLSchema-instance"
         xsi:schemaLocation="http://maven.apache.org/POM/4.0.0 http://maven.apache.org/xsd/maven-4.0.0.xsd">
    <modelVersion>4.0.0</modelVersion>

    <parent>
        <groupId>org.springframework.boot</groupId>
        <artifactId>spring-boot-starter-parent</artifactId>
        <version>2.5.2</version>
    </parent>

    <groupId>com.gkatzioura</groupId>
    <artifactId>r2dbc-reactor</artifactId>
    <version>1.0-SNAPSHOT</version>

    <properties>
        <maven.compiler.source>11</maven.compiler.source>
        <maven.compiler.target>11</maven.compiler.target>
    </properties>

    <dependencies>
        <dependency>
            <groupId>org.springframework.boot</groupId>
            <artifactId>spring-boot-starter-data-r2dbc</artifactId>
        </dependency>
        <dependency>
            <groupId>org.springframework.data</groupId>
            <artifactId>spring-data-commons</artifactId>
        </dependency>

        <dependency>
            <groupId>com.h2database</groupId>
            <artifactId>h2</artifactId>
            <scope>runtime</scope>
        </dependency>
        <dependency>
            <groupId>io.r2dbc</groupId>
            <artifactId>r2dbc-h2</artifactId>
            <scope>runtime</scope>
        </dependency>
        <dependency>
            <groupId>org.springframework.boot</groupId>
            <artifactId>spring-boot-starter-test</artifactId>
            <scope>test</scope>
        </dependency>
        <dependency>
            <groupId>io.projectreactor</groupId>
            <artifactId>reactor-test</artifactId>
            <scope>test</scope>
        </dependency>
    </dependencies>

</project>

We imported spring data from r2dbc, the h2 r2dbc driver, the h2 binary as well as the test utils.

Supposing that this is our schema.
This schema is a postgresql schema.

create table order_request (
	id uuid NOT NULL constraint or_id_pk primary key,
	created_by varchar,
	created timestamp default now()              not null,
	updated timestamp default now()              not null
);

We shall add it later to test/resources/schema.sql for testing purposes.

Also let’s add a new model

package com.gkatzioura.r2dbc.model;

import java.time.LocalDateTime;
import java.util.UUID;

import org.springframework.data.annotation.Id;
import org.springframework.data.domain.Persistable;
import org.springframework.data.relational.core.mapping.Table;

@Table("order_request")
public class OrderRequest implements Persistable<UUID> {

    @Id
    private UUID id;
    private String createdBy;
    private LocalDateTime created;
    private LocalDateTime updated;

    public void setId(UUID id) {
        this.id = id;
    }

    public String getCreatedBy() {
        return createdBy;
    }

    public void setCreatedBy(String createdBy) {
        this.createdBy = createdBy;
    }

    public LocalDateTime getCreated() {
        return created;
    }

    public void setCreated(LocalDateTime created) {
        this.created = created;
    }

    public LocalDateTime getUpdated() {
        return updated;
    }

    public void setUpdated(LocalDateTime updated) {
        this.updated = updated;
    }

    @Override
    public UUID getId() {
        return id;
    }

    @Override
    public boolean isNew() {
        return created == null;
    }

}

Pay attention to isNew method. This way the repository can identify if the object should be persisted or updated.

Now onwards to our Repository

package com.gkatzioura.r2dbc.repository;

import java.util.UUID;
import org.springframework.data.repository.reactive.ReactiveCrudRepository;
import com.gkatzioura.r2dbc.model.OrderRequest;

public interface OrderRepository extends ReactiveCrudRepository<OrderRequest, UUID> {
}

Let’s put some tests.

As mentioned the schema above will reside in test/resources/schema.sql

We shall add some configuration for the test h2 db. We need to make sure that h2 will pickup the postgresql interface.

package com.gkatzioura.r2dbc;

import org.springframework.context.annotation.Bean;
import org.springframework.context.annotation.Configuration;
import org.springframework.core.io.ClassPathResource;
import org.springframework.data.r2dbc.config.AbstractR2dbcConfiguration;
import org.springframework.data.r2dbc.repository.config.EnableR2dbcRepositories;
import org.springframework.r2dbc.connection.init.CompositeDatabasePopulator;
import org.springframework.r2dbc.connection.init.ConnectionFactoryInitializer;
import org.springframework.r2dbc.connection.init.ResourceDatabasePopulator;

import io.r2dbc.h2.H2ConnectionFactory;
import io.r2dbc.spi.ConnectionFactory;

@Configuration
@EnableR2dbcRepositories
public class H2ConnectionConfiguration extends AbstractR2dbcConfiguration  {

    @Override
    public ConnectionFactory connectionFactory() {
        return new H2ConnectionFactory(
                io.r2dbc.h2.H2ConnectionConfiguration.builder()
                                                     .url("mem:testdb;MODE=PostgreSQL;DB_CLOSE_DELAY=-1;")
                                                     .build()
        );
    }

    @Bean
    public ConnectionFactoryInitializer initializer() {
        var initializer = new ConnectionFactoryInitializer();
        initializer.setConnectionFactory(connectionFactory());

        var databasePopulator = new CompositeDatabasePopulator();
        databasePopulator.addPopulators(new ResourceDatabasePopulator(new ClassPathResource("schema.sql")));
        initializer.setDatabasePopulator(databasePopulator);
        return initializer;
    }

}

With this configuration we create a H2 database simulating a Postgresql DB, we create the schemas as well as enable the creation of the R2DBC repositories.

Also let’s add a test.

package com.gkatzioura.r2dbc.repository;

import java.util.UUID;
import org.junit.jupiter.api.Test;
import org.junit.jupiter.api.extension.ExtendWith;
import org.springframework.beans.factory.annotation.Autowired;
import org.springframework.context.annotation.Import;
import org.springframework.test.context.junit.jupiter.SpringExtension;
import com.gkatzioura.r2dbc.H2ConnectionConfiguration;
import com.gkatzioura.r2dbc.model.OrderRequest;
import reactor.test.StepVerifier;

@ExtendWith({SpringExtension.class})
@Import({H2ConnectionConfiguration.class})
class OrderRepositoryTest {

    @Autowired
    private OrderRepository orderRepository;

    @Test
    void testSave() {
        UUID id = UUID.randomUUID();
        OrderRequest orderRequest = new OrderRequest();
        orderRequest.setId(id);
        orderRequest.setCreatedBy("test-user");

        var persisted = orderRepository.save(orderRequest)
                                       .map(a -> orderRepository.findById(a.getId()))
                                       .flatMap(a -> a.map(b -> b.getId()));

        StepVerifier.create(persisted).expectNext(id).verifyComplete();
    }
}

That’s it, you can find the code on github.

Git commit id Plugin with Spring Actuator

The git commit-id plugin is very useful to depict the state of the git repository when a binary has been created. Imagine the case of multiple deployments in a shared staging environment using the same version. You did not cut off your new version yet and multiple deployment are executed, having that information included helps.

We will start by a simple maven Project with a hello world application.

<?xml version="1.0" encoding="UTF-8"?>
<project xmlns="http://maven.apache.org/POM/4.0.0"
         xmlns:xsi="http://www.w3.org/2001/XMLSchema-instance"
         xsi:schemaLocation="http://maven.apache.org/POM/4.0.0 http://maven.apache.org/xsd/maven-4.0.0.xsd">

    <modelVersion>4.0.0</modelVersion>

    <artifactId>git-commit-id-example</artifactId>
    <groupId>com.gkatzioura</groupId>
    <version>1.0-SNAPSHOT</version>

    <properties>
        <maven.compiler.source>11</maven.compiler.source>
        <maven.compiler.target>11</maven.compiler.target>
    </properties>

</project>

Then a main class

package com.gkatzioura.commitid;

public class Application {
    public static void main(String[] args) {
    }
}

Let’s add the plugin

<build>
        <plugins>
            <plugin>
                <groupId>io.github.git-commit-id</groupId>
                <artifactId>git-commit-id-maven-plugin</artifactId>
                <version>5.0.0</version>
                <executions>
                    <execution>
                        <id>get-the-git-infos</id>
                        <goals>
                            <goal>revision</goal>
                        </goals>
                        <phase>initialize</phase>
                    </execution>
                </executions>
                <configuration>
                    <dotGitDirectory>${project.basedir}/../.git</dotGitDirectory>
                    <generateGitPropertiesFile>true</generateGitPropertiesFile>
                </configuration>
            </plugin>
        </plugins>
    </build>

Obviously this will work, the file will be located at target/classes/git.properties, but we do want to make it easier to retrieve that information.
It’s much easier to have an endpoint that exposes this piece of information, than checking binaries.

This brings us to actuator.
On Spring we have actuator endpoints that show various information like health or in our case info.
Eventually we can inject this information to the info actuator endpoint.

So let’s import our Spring boot dependencies

<?xml version="1.0" encoding="UTF-8"?>
<project xmlns="http://maven.apache.org/POM/4.0.0"
         xmlns:xsi="http://www.w3.org/2001/XMLSchema-instance"
         xsi:schemaLocation="http://maven.apache.org/POM/4.0.0 http://maven.apache.org/xsd/maven-4.0.0.xsd">

    <modelVersion>4.0.0</modelVersion>

    <artifactId>git-commit-id-example</artifactId>
    <groupId>com.gkatzioura</groupId>
    <version>1.0-SNAPSHOT</version>

    <properties>
        <maven.compiler.source>11</maven.compiler.source>
        <maven.compiler.target>11</maven.compiler.target>
    </properties>

    <parent>
        <groupId>org.springframework.boot</groupId>
        <artifactId>spring-boot-starter-parent</artifactId>
        <version>2.5.3</version>
        <relativePath/> <!-- lookup parent from repository -->
    </parent>

    <dependencies>
        <dependency>
            <groupId>org.springframework.boot</groupId>
            <artifactId>spring-boot-starter-webflux</artifactId>
        </dependency>
        <dependency>
            <groupId>org.springframework.boot</groupId>
            <artifactId>spring-boot-starter-actuator</artifactId>
        </dependency>
    </dependencies>

    <build>
        <plugins>
            <plugin>
                <groupId>org.springframework.boot</groupId>
                <artifactId>spring-boot-maven-plugin</artifactId>
            </plugin>
            <plugin>
                <groupId>io.github.git-commit-id</groupId>
                <artifactId>git-commit-id-maven-plugin</artifactId>
                <version>5.0.0</version>
                <executions>
                    <execution>
                        <id>get-the-git-infos</id>
                        <goals>
                            <goal>revision</goal>
                        </goals>
                        <phase>initialize</phase>
                    </execution>
                </executions>
                <configuration>
                    <dotGitDirectory>${project.basedir}/../.git</dotGitDirectory>
                    <generateGitPropertiesFile>true</generateGitPropertiesFile>
                </configuration>
            </plugin>
        </plugins>
    </build>
</project>

Also we shall update our main class in order to spin up our Spring Boot Application

package com.gkatzioura.commitid;

import org.springframework.boot.SpringApplication;
import org.springframework.boot.autoconfigure.SpringBootApplication;
import org.springframework.context.ConfigurableApplicationContext;

@SpringBootApplication
public class Application {

    public static void main(String[] args) {
        ConfigurableApplicationContext context = SpringApplication.run(Application.class, args);
    }

}

Then you need to enable the info endpoint. Can be done by adding the setting on the properties or env variables.

management.endpoints.web.exposure.include=health,info

Once up and running by going to

curl http://localhost:8080/actuator/info

We shall be presented with the git information

{
  "git": {
    "branch": "master",
    "commit": {
      "id": "e77882e",
      "time": "2021-06-20T09:32:36Z"
    }
  }
}

This was pretty seamless so let’s explain what happens behind the scenes.

By doing mvn clean compile the git.properties file get’s generated.
By running the application, the info endpoint will be enabled based on the properties
The Spring environment will pickup the git.properties files.
Actuator will identify that the file exists and will expose it on the properties.

You can find the source code on github.

Keeping track of requests and Responses on Spring WebFlux

In any rest-api based application it’s a matter of time when there is going to be the need to intercept the requests towards the application and execute more than one actions. If those actions, are actions that need to apply towards all requests to the application then the usage of filters makes sense, for example security.

On Servlet based applications we used to have ContentCachingRequestWrapper and ContentCachingResponseWrapper. We look for the same qualities the above give but in a WebFlux environment.

The equivalent solution are the decorator classes provided by the webflux package: ServerHttpRequestDecorator, ServerHttpResponeDecorator, ServerWebExchangeDecorator.

Let’s get started with a simple Flux based api.

First we import the dependencies

	<dependencies>
		<dependency>
			<groupId>org.springframework.boot</groupId>
			<artifactId>spring-boot-starter-webflux</artifactId>
		</dependency>
		<dependency>
			<groupId>org.projectlombok</groupId>
			<artifactId>lombok</artifactId>
			<version>1.18.20</version>
			<scope>provided</scope>
		</dependency>

		<dependency>
			<groupId>org.springframework.boot</groupId>
			<artifactId>spring-boot-starter-test</artifactId>
			<scope>test</scope>
		</dependency>
		<dependency>
			<groupId>io.projectreactor</groupId>
			<artifactId>reactor-test</artifactId>
			<scope>test</scope>
		</dependency>
	</dependencies>

	<build>
		<plugins>
			<plugin>
				<groupId>org.springframework.boot</groupId>
				<artifactId>spring-boot-maven-plugin</artifactId>
			</plugin>
		</plugins>
	</build>

The we create a simple model for a post request.

package com.gkatzioura.reactor.fluxfiltercapture;

import lombok.AllArgsConstructor;
import lombok.Builder;
import lombok.Data;
import lombok.NoArgsConstructor;

@Data
@Builder
@AllArgsConstructor
@NoArgsConstructor
public class Info {

    private String description;

}

And the response

package com.gkatzioura.reactor.fluxfiltercapture;

import lombok.AllArgsConstructor;
import lombok.Builder;
import lombok.Data;
import lombok.NoArgsConstructor;

@Data
@Builder
@AllArgsConstructor
@NoArgsConstructor
public class InfoResponse {

    private boolean success;

    public static InfoResponse successful() {
        return InfoResponse.builder().success(true).build();
    }
}

A controller that uses the models will be implemented. The controller would be a simple echo.

package com.gkatzioura.reactor.fluxfiltercapture;

import org.springframework.web.bind.annotation.PostMapping;
import org.springframework.web.bind.annotation.RequestBody;
import org.springframework.web.bind.annotation.RestController;

import reactor.core.publisher.Mono;

@RestController
public class InfoController {


    @PostMapping("/info")
    public Mono<InfoResponse> getInfo(@RequestBody Info info) {
        return Mono.just(InfoResponse.builder().success(true).build());
    }

}

A curl POST can help us debug.

curl --location --request POST 'http://localhost:8080/info' \
--header 'Content-Type: application/json' \
--data-raw '{
"description": "Check"
}'

Your typical filter on Webflux has to implement the WebFilter interface and then if annotated will be picked up by the runtime.

@Component
public class ExampleFilter implements WebFilter {

    @Override
    public Mono<Void> filter(ServerWebExchange serverWebExchange,
                             WebFilterChain webFilterChain) {
        return webFilterChain.filter(serverWebExchange);
    }

}

In our case we want to keep track both of the response and the request body.
Let’s start by creating a ServerHttpRequestDecorator implementation.

package com.gkatzioura.reactor.fluxfiltercapture;

import java.nio.charset.StandardCharsets;
import org.springframework.core.io.buffer.DataBuffer;
import org.springframework.http.server.reactive.ServerHttpRequest;
import org.springframework.http.server.reactive.ServerHttpRequestDecorator;
import reactor.core.publisher.Flux;

public class BodyCaptureRequest extends ServerHttpRequestDecorator {

    private final StringBuilder body = new StringBuilder();

    public BodyCaptureRequest(ServerHttpRequest delegate) {
        super(delegate);
    }

    public Flux<DataBuffer> getBody() {
        return super.getBody().doOnNext(this::capture);
    }

    private void capture(DataBuffer buffer) {
        this.body.append(StandardCharsets.UTF_8.decode(buffer.asByteBuffer()).toString());
    }

    public String getFullBody() {
        return this.body.toString();
    }

}

As we can see on the getBody implementation we add a method which will capture the byte chunks that flow while the actual service reads the body.
Once the request is finished the accumulated data will form the actual body.

Same pattern will apply for the ServerHttpResponeDecorator implementation.

package com.gkatzioura.reactor.fluxfiltercapture;

import java.nio.charset.StandardCharsets;

import org.reactivestreams.Publisher;
import org.springframework.core.io.buffer.DataBuffer;
import org.springframework.http.server.reactive.ServerHttpRequestDecorator;
import org.springframework.http.server.reactive.ServerHttpResponse;
import org.springframework.http.server.reactive.ServerHttpResponseDecorator;

import reactor.core.publisher.Flux;
import reactor.core.publisher.Mono;

public class BodyCaptureResponse extends ServerHttpResponseDecorator {

    private final StringBuilder body = new StringBuilder();

    public BodyCaptureResponse(ServerHttpResponse delegate) {
        super(delegate);
    }

    @Override
    public Mono<Void> writeWith(Publisher<? extends DataBuffer> body) {
        Flux<DataBuffer> buffer = Flux.from(body);
        return super.writeWith(buffer.doOnNext(this::capture));
    }

    private void capture(DataBuffer buffer) {
        this.body.append(StandardCharsets.UTF_8.decode(buffer.asByteBuffer()).toString());
    }

    public String getFullBody() {
        return this.body.toString();
    }

}

Here we override the writeWith function. Those data are are written and pushed down the stream we decorate the argument with a Flux in order to be able to use a method on doOnNext.

In both cases the bytes of the body and the response are accumulated. This might work for specific use cases, for example altering the request/response. If your use case is covered by just streaming the bytes to another system there is no need for accumulation, just an altered function on getBody and writeWith that streams the data will do the work.

Let’s go to our parent decorator that extends ServerWebExchangeDecorator.

package com.gkatzioura.reactor.fluxfiltercapture;

import org.springframework.web.server.ServerWebExchange;
import org.springframework.web.server.ServerWebExchangeDecorator;

public class BodyCaptureExchange extends ServerWebExchangeDecorator {

    private BodyCaptureRequest bodyCaptureRequest;
    private BodyCaptureResponse bodyCaptureResponse;

    public BodyCaptureExchange(ServerWebExchange exchange) {
        super(exchange);
        this.bodyCaptureRequest = new BodyCaptureRequest(exchange.getRequest());
        this.bodyCaptureResponse = new BodyCaptureResponse(exchange.getResponse());
    }

    @Override
    public BodyCaptureRequest getRequest() {
        return bodyCaptureRequest;
    }

    @Override
    public BodyCaptureResponse getResponse() {
        return bodyCaptureResponse;
    }

}

Time to focus on our filter. To make the example simple we will print on the console the request and response body.

package com.gkatzioura.reactor.fluxfiltercapture;

import org.springframework.stereotype.Component;
import org.springframework.web.server.ServerWebExchange;
import org.springframework.web.server.WebFilter;
import org.springframework.web.server.WebFilterChain;

import reactor.core.publisher.Mono;

@Component
public class CustomWebFilter implements WebFilter {

    @Override
    public Mono<Void> filter(ServerWebExchange serverWebExchange,
                             WebFilterChain webFilterChain) {
        BodyCaptureExchange bodyCaptureExchange = new BodyCaptureExchange(serverWebExchange);
        return webFilterChain.filter(bodyCaptureExchange).doOnSuccess( (se) -> {
            System.out.println("Body request "+bodyCaptureExchange.getRequest().getFullBody());
            System.out.println("Body response "+bodyCaptureExchange.getResponse().getFullBody());
        });
    }

}

If we run the Curl above eventually we shall have the body of the request and response printed.
You can find the source code on github.

Spring Boot and Micrometer with Prometheus Part 6: Securing metrics

Previously we successfully spun up our Spring Boot application With Prometheus. An endpoint in our Spring application is exposing our metric data so that prometheus is able to retrieve them.
The main question that comes to mind is how to secure this information.

Spring already provides us with its great security framework, so it will be fairly easy to use it for our application. The goal would be to use basic authentication for the actuator/prometheus endpoints and also configure prometheus in order to access that information using basic authentication.

So the first step is to enable the security on our app. The first step is to add the security jar.

    <dependency>
        <groupId>org.springframework.boot</groupId>
        <artifactId>spring-boot-starter-security</artifactId>
    </dependency>

The Spring boot application will get secured on its own by generating a password for the default user.
However we do want to have control over the username and password so we are going to use some environment variables.

By running the application with the credentials for the default user we have the prometheus endpoints secured with a minimal configuration.

SPRING_SECURITY_USER_NAME=test-user SPRING_SECURITY_USER_PASSWORD=test-password mvn spring-boot:run

So now that we have the security setup on our app, it’s time to update our prometheus config.

scrape_configs:
  - job_name: 'prometheus-spring'
    scrape_interval: 1m
    metrics_path: '/actuator/prometheus'
    static_configs:
      - targets: ['my.local.machine:8080']
    basic_auth:
      username: "test-user"
      password: "test-password"

So let’s run again prometheus as described previously.

To sum app after this change prometheus will gather metrics data for our application in a secure way.