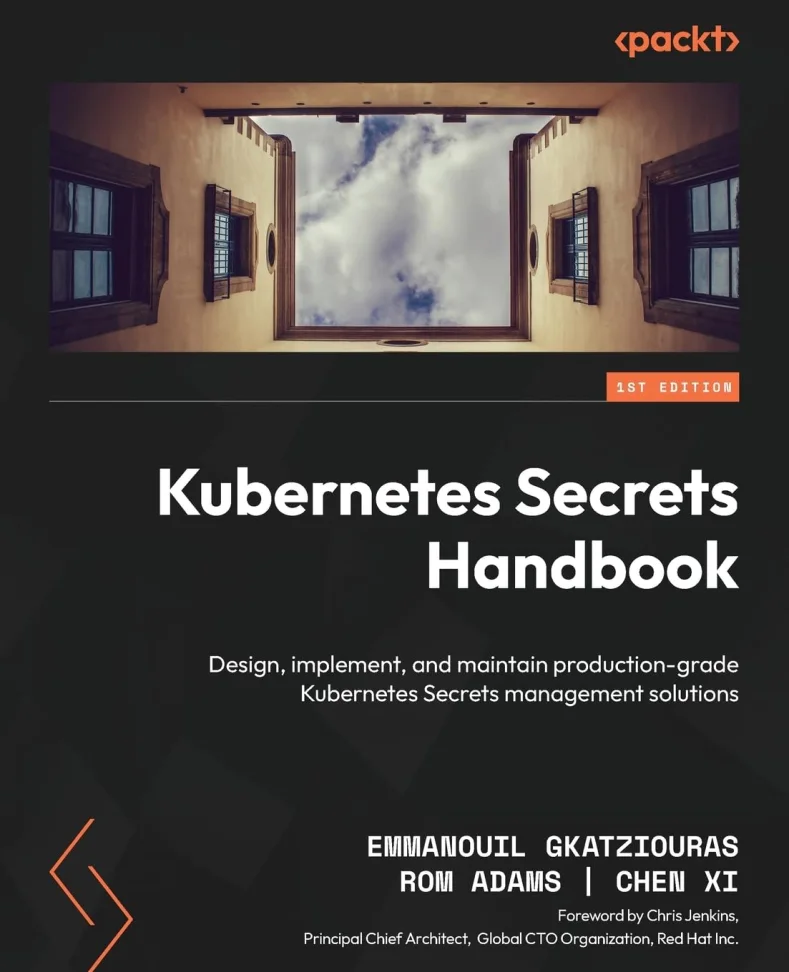
New Book Day: Kubernetes Secrets Handbook

Since 2015 when Kubernetes was released to the public there was continuous adoption from engineers and a huge progress in terms of tooling and features.  Kubernetes is the most popular container orchestration platform and this is due to various reasons:

  • It’s open source
  • Container based
  • It has a vibrant community
  • A reach ecosystem of extension and tools
  • Easiness of deployments and automation
  • Robustness
  • Scalability

A very important aspect on Kubernetes is secret management. You see when you get started with Kubernetes everything seems to work magically but then you start to wonder on security aspects.
Once you store and fetch a secret using the kubectl command several questions comes to mind.

  • Where is this secret stored
  • Is it encrypted
  • What are the minimum permissions to interact with the secrets
  • What happens on a datacenter outage
  • How safe I am on a disaster recovery scenario
  • What if I want to use the secret with non Kubernetes deployments
  • How my CI/CD interacts with secrets
  • How can I track any interaction with the secrets
  • How about integrating with my Cloud Platform
  • Am I limited to the etcd storage

Secrets management on Kubernetes is a huge topic by itself. For this reason Rom Adams Chen Xi and I embarked on the journey of authoring this book. Our goal was to make it easier for the Kubernetes users to identify the landscape around secrets management and also assist them in the technical choices they will have to make.

The book starts with an overview of Kubernetes, its architecture and design principles and how its components like etcd contribute secret storage. We focus on the different types of secrets and their applications on the various components of Kubernetes, for example the integration of a TLS secret with an Ingress. Another aspect tackled is securing the secrets using RBAC policies, by following the principle of least privilege. Then we focus on tracking down any interactions with secrets through Kubernetes Auditing.

Following the book focuses on encrypting the secrets the Kubernetes Native Way. The reader will learn on the default encryption providers that Kubernetes offers, cbc and gcm, and how Kubernetes can be configured to enable the encryption of secrets on etcd. Later we focus on hardening the system where the secrets reside physically. Following there is a section on troubleshooting secret provisioning issues and common mistakes to avoid.

We also focus on more advanced concepts. We expand on security and compliance and how to address the security concerns at the people, process, and technology levels. We expand on Disaster Recovery and Backups. Backup strategies to employ, tools that we can use and Disaster Recovery plans for Kubernetes. As we proceed we expand more on the security risks that come with secret management, the challenges that we have to tackle on different phases of secret management and the mitigation strategies for security risks.

The last part is fully focused on external secret providers. We focus on the ways that is feasible to use an external secrets providers such as secret injection or the utilisation of the Secrets Store CSI Driver.

We take a deep dive on Cloud Providers such as AWS, Azure, GCP and their secret storage offerings. We get to deploy Kubernetes clusters to the cloud and integrate them with the available secret stores. We focus on disaster recovery capabilities and the resiliency offered in these solutions. Furthermore we focus on observability, monitoring and auditing of secrets in the cloud. We also make sure that we follow the permission of least privilege, and provide fine grained IAM policies. Apart from focusing on the usage of external secret providers we will also examine the usage of the Key Management Systems (KMS) provided from the cloud providers and how we can integrate them with our Kubernetes installation in order to encrypt secrets.

Following we focus on external solutions such as HashiCorp Vault and Conjur. We examine how they work behind the scenes, how they ensure the security of the secrets as well as other important topics such as resiliency, logging, monitoring and disaster recovery. We examine their integration with Kubernetes and how they help us when it comes to secrets management.

Finally we wrap up on cases studies of secret management, CI/CD practises and discuss the future of Kubernetes Secrets Management.

I am really proud of this book and I believe it gives lots of value to the reader. It is a great source of information on Kubernetes Secrets but also it provides a very hands on experience.

You can find the book on Amazon as well as on the Packt portal.

Happy reading!!!


Debezium in Embedded mode

In a previous blog we setup a Debezium server reading events from a from a PostgresQL database. Then we streamed those changes to a Redis instance through a Redis stream.

We might get the impression that in order to run Debezium we need to have two extra components running in our infrastructure:

  • A standalone Debezium server instance
  • A software component with streaming capabilities and various integrations, such as Redis or Kafka

This is not always the case since Debezium can run in embedded mode. By running in embedded mode you use Debezium in order to read directly from a database’s transaction log. It is up to you how you are gonna handle the entries retrieved. The process reading the entries from the transaction log can reside on any Java application thus there is no need for a standalone deployment.

Apart from the number of components reduced, the other benefit is that we can alter the entries as we read them from the database and take action in our application. Sometimes we might just need a subset of the capabilities offered.

Let’s use the same PotsgreSQL configurations we used previously

listen_addresses = '*'
port = 5432
max_connections = 20
shared_buffers = 128MB
temp_buffers = 8MB
work_mem = 4MB
wal_level = logical
max_wal_senders = 3

Also we shall create an initialization script for the table we want to focus

#!/bin/bash
set -e
 
psql -v ON_ERROR_STOP=1 --username "$POSTGRES_USER" --dbname "$POSTGRES_DB" <<-EOSQL
  create schema test_schema;
  create table test_schema.employee(
          id  SERIAL PRIMARY KEY,
          firstname   TEXT    NOT NULL,
          lastname    TEXT    NOT NULL,
          email       TEXT    not null,
          age         INT     NOT NULL,
          salary         real,
          unique(email)
      );
EOSQL

Our Docker Compose file will look like this

version: '3.1'
 
services:

  postgres:
    image: postgres
    restart: always
    environment:
      POSTGRES_USER: postgres
      POSTGRES_PASSWORD: postgres
    volumes:
      - ./postgresql.conf:/etc/postgresql/postgresql.conf
      - ./init:/docker-entrypoint-initdb.d
    command:
      - "-c"
      - "config_file=/etc/postgresql/postgresql.conf"
    ports:
      - 5432:5432

The configuration files we created are mounted to the PostgreSQL Docker container. Docker Compose V2 is out there with many good features, you can find more about it on the book I authored:
A Developer’s Essential Guide to Docker Compose
.

Provided we run docker compose up, a postgresql server with a schema and a table will be up and running. Also that server will have logical decoding enabled and Debezium shall be able to track changes on that table through the transaction log.
We have everything needed to proceed on building our application.

First let’s add the dependencies needed:

 
    <properties>
        <maven.compiler.source>17</maven.compiler.source>
        <maven.compiler.target>17</maven.compiler.target>
        <project.build.sourceEncoding>UTF-8</project.build.sourceEncoding>
        <version.debezium>2.3.1.Final</version.debezium>
        <logback-core.version>1.4.12</logback-core.version>
    </properties>

    <dependencies>
        <dependency>
            <groupId>io.debezium</groupId>
            <artifactId>debezium-api</artifactId>
            <version>${version.debezium}</version>
        </dependency>
        <dependency>
            <groupId>io.debezium</groupId>
            <artifactId>debezium-embedded</artifactId>
            <version>${version.debezium}</version>
        </dependency>
        <dependency>
            <groupId>io.debezium</groupId>
            <artifactId>debezium-connector-postgres</artifactId>
            <version>${version.debezium}</version>
        </dependency>
        <dependency>
            <groupId>io.debezium</groupId>
            <artifactId>debezium-storage-jdbc</artifactId>
            <version>${version.debezium}</version>
        </dependency>
        <dependency>
            <groupId>ch.qos.logback</groupId>
            <artifactId>logback-classic</artifactId>
            <version>${logback-core.version}</version>
        </dependency>
        <dependency>
            <groupId>ch.qos.logback</groupId>
            <artifactId>logback-core</artifactId>
            <version>${logback-core.version}</version>
        </dependency>
    </dependencies>

We also need to create the Debezium embedded properties:

name=embedded-debezium-connector
connector.class=io.debezium.connector.postgresql.PostgresConnector
offset.storage=org.apache.kafka.connect.storage.FileOffsetBackingStore
offset.flush.interval.ms=60000
database.hostname=127.0.0.1
database.port=5432
database.user=postgres
database.password=postgres
database.dbname=postgres
database.server.name==embedded-debezium
debezium.source.plugin.name=pgoutput
plugin.name=pgoutput
database.server.id=1234
topic.prefix=embedded-debezium
schema.include.list=test_schema
table.include.list=test_schema.employee

Apart from establishing the connection towards the PostgresQL Database we also decided to store the offset in a file. By using the offset in Debezium we keep track of the progress we do on processing the events.

On each change that happens on the table test_schema.employee we shall receive an event. Once we receive that event our codebase should handle it.
To handle the events we need to create a DebeziumEngine.ChangeConsumer. The ChangeConsumer will consume the events emitted.

package com.egkatzioura;

import io.debezium.engine.DebeziumEngine;
import io.debezium.engine.RecordChangeEvent;
import org.apache.kafka.connect.source.SourceRecord;

import java.util.List;

public class CustomChangeConsumer implements DebeziumEngine.ChangeConsumer<RecordChangeEvent<SourceRecord>> {

    @Override
    public void handleBatch(List<RecordChangeEvent<SourceRecord>> records, DebeziumEngine.RecordCommitter<RecordChangeEvent<SourceRecord>> committer) throws InterruptedException {
        for(RecordChangeEvent<SourceRecord> record: records) {
            System.out.println(record.record().toString());
        }
    }

}

Every incoming event will be printed on the console.

Now we can add our main class where we setup the engine.

package com.egkatzioura;

import io.debezium.embedded.Connect;
import io.debezium.engine.DebeziumEngine;
import io.debezium.engine.format.ChangeEventFormat;

import java.io.File;
import java.io.IOException;
import java.io.InputStream;
import java.util.Properties;

public class Application {

    public static void main(String[] args) throws IOException {
        Properties properties = new Properties();

        try(final InputStream stream = Application.class.getClassLoader().getResourceAsStream("embedded_debezium.properties")) {
            properties.load(stream);
        }
        properties.put("offset.storage.file.filename",new File("offset.dat").getAbsolutePath());

        var engine = DebeziumEngine.create(ChangeEventFormat.of(Connect.class))
                .using(properties)
                .notifying(new CustomChangeConsumer())
                .build();
        engine.run();

    }

}

Provided our application is running as well as the PostgresQL database we configured previously, we can start inserting data

docker exec -it debezium-embedded-postgres-1 psql postgres postgres
psql (15.3 (Debian 15.3-1.pgdg120+1))
Type "help" for help.

postgres=# insert into test_schema.employee (firstname,lastname,email,age,salary) values ('John','Doe 1','john1@doe.com',18,1234.23);

Also we can see the change on the console

SourceRecord{sourcePartition={server=embedded-debezium}, sourceOffset={last_snapshot_record=true, lsn=22518160, txId=743, ts_usec=1705916606794160, snapshot=true}} ConnectRecord{topic='embedded-debezium.test_schema.employee', kafkaPartition=null, key=Struct{id=1}, keySchema=Schema{embedded-debezium.test_schema.employee.Key:STRUCT}, value=Struct{after=Struct{id=1,firstname=John,lastname=Doe 1,email=john1@doe.com,age=18,salary=1234.23},source=Struct{version=2.3.1.Final,connector=postgresql,name=embedded-debezium,ts_ms=1705916606794,snapshot=last,db=postgres,sequence=[null,"22518160"],schema=test_schema,table=employee,txId=743,lsn=22518160},op=r,ts_ms=1705916606890}, valueSchema=Schema{embedded-debezium.test_schema.employee.Envelope:STRUCT}, timestamp=null, headers=ConnectHeaders(headers=)}

We did it. We managed to run Debezium through a Java application without the need of a standalone Debezium server running or a streaming component. You can find the code on GitHub.

Avro Schema Generate and Use

If you implement streaming pipelines, chances are that you use Apache Avro.
Since Avro is a popular choice for serializing data it is widely supported by streaming tools and vendors. Also schema registries are available in order to help with the schema evolution.

Let’s run a basic Avro example.

It all starts with creating the schema on an avsc file. The goal would be to send request metrics for an http endpoint.

{
  "namespace": "com.egkatzioura.avro.model",
  "name": "RequestMetric",
  "type" : "record",
  "fields" : [
    {
      "name": "endpoint",
      "type" : ["null","string"],
      "default": null

    },
    {
      "name" : "status",
      "type" : ["null","int"],
      "default": null
    },
    {
      "name" : "error_message",
      "type" : ["null", "string"],
      "default": null
    },
    {
      "name" : "created_at",
      "type": "long",
      "logicalType" : "timestamp-millis"
    }
  ]
}

If the fields in a record are nullable we need to specify so in the schema ["null", "string"]. Also we want to sent timestamp thus we shall use a logicalType. A logicalType can be a complex or a primitive type, in our case it is a long. By using the attribute logicalType we provide additional semantic meaning to that type.

We will create the directory src/main/avro and place the file under the name request_metric.avsc.

Provided we use maven in order to generate the class files we need to have certain plugins included.


    <dependencies>
        <dependency>
            <groupId>org.apache.avro</groupId>
            <artifactId>avro</artifactId>
            <version>1.11.1</version>
        </dependency>
    </dependencies>

    <build>
        <plugins>
            <plugin>
                <groupId>org.apache.avro</groupId>
                <artifactId>avro-maven-plugin</artifactId>
                <version>1.11.1</version>
                <executions>
                    <execution>
                        <phase>generate-sources</phase>
                        <goals>
                            <goal>schema</goal>
                        </goals>
                        <configuration>
                            <sourceDirectory>${project.basedir}/src/main/avro/</sourceDirectory>
                            <outputDirectory>${project.basedir}/src/main/java/</outputDirectory>
                        </configuration>
                    </execution>
                </executions>
            </plugin>
        </plugins>
    </build>

As we can see we specified where the schemas are placed within the project by using the sourceDirectory configuration. By using the outputDirectory configuration we specify where the generated classes will be placed.

By running on maven mvn generate-sources the class RequestMetric will be generated.

Let’s create and read an avro file.

import com.egkatzioura.avro.model.RequestMetric;
import org.apache.avro.file.DataFileReader;
import org.apache.avro.file.DataFileWriter;
import org.apache.avro.io.DatumReader;
import org.apache.avro.specific.SpecificDatumReader;
import org.apache.avro.specific.SpecificDatumWriter;

import java.io.File;
import java.io.IOException;


public class Application {

    public static void main(String[] args) throws IOException {
        RequestMetric a = new RequestMetric();
        a.setEndpoint("/a");
        a.setStatus(200);
        a.setCreatedAt(System.currentTimeMillis());

        RequestMetric b = new RequestMetric();
        b.setEndpoint("/b");
        b.setStatus(201);
        b.setCreatedAt(System.currentTimeMillis());

        File file = new File("metric.avro");

        SpecificDatumWriter<RequestMetric> datumWriter = new SpecificDatumWriter<>(RequestMetric.class);

        try(DataFileWriter<RequestMetric> dataFileWriter = new DataFileWriter<>(datumWriter)) {
            dataFileWriter.create(a.getSchema(), file);
            dataFileWriter.append(a);
            dataFileWriter.append(b);
        }

        DatumReader<RequestMetric> datumReader = new SpecificDatumReader<>(RequestMetric.class);
        DataFileReader<RequestMetric> dataFileReader = new DataFileReader<>(file, datumReader);
        RequestMetric requestMetric= null;
        while (dataFileReader.hasNext()) {
            requestMetric = dataFileReader.next(requestMetric);
            System.out.println(requestMetric);
        }

    }
}

We did write the Avro file and also we read from it. We don’t have to serialize our data into a file we can also do so in memory.

package com.egkatzioura.avro;

import com.egkatzioura.avro.model.RequestMetric;
import org.apache.avro.file.DataFileReader;
import org.apache.avro.file.DataFileWriter;
import org.apache.avro.io.*;
import org.apache.avro.specific.SpecificDatumReader;
import org.apache.avro.specific.SpecificDatumWriter;

import java.io.*;


public class InMemoryExample {

    public static void main(String[] args) throws IOException {
        RequestMetric a = new RequestMetric();
        a.setEndpoint("/a");
        a.setStatus(200);
        a.setCreatedAt(System.currentTimeMillis());

        RequestMetric b = new RequestMetric();
        b.setEndpoint("/b");
        b.setStatus(201);
        b.setCreatedAt(System.currentTimeMillis());

        ByteArrayOutputStream outputStream = new ByteArrayOutputStream();
        Encoder encoder = EncoderFactory.get().directBinaryEncoder(outputStream, null);
        SpecificDatumWriter<RequestMetric> datumWriter = new SpecificDatumWriter<>(RequestMetric.class);

        datumWriter.write(a, encoder);
        datumWriter.write(b, encoder);
        encoder.flush();

        outputStream.close();
        byte[] bytes = outputStream.toByteArray();

        DatumReader<RequestMetric> datumReader = new SpecificDatumReader<>(RequestMetric.class);

        datumReader.setSchema(a.getSchema());


        try(ByteArrayInputStream inputStream = new ByteArrayInputStream(bytes)) {
            Decoder decoder = DecoderFactory.get().directBinaryDecoder(inputStream, null);

            while(true){
                try {
                    RequestMetric record = datumReader.read(null, decoder);
                    System.out.println(record);
                } catch (EOFException eof) {
                    break;
                }
            }
        }
    }

}

That’s all for now, we specified an Avro schema, generated the model and read and wrote Avro records.