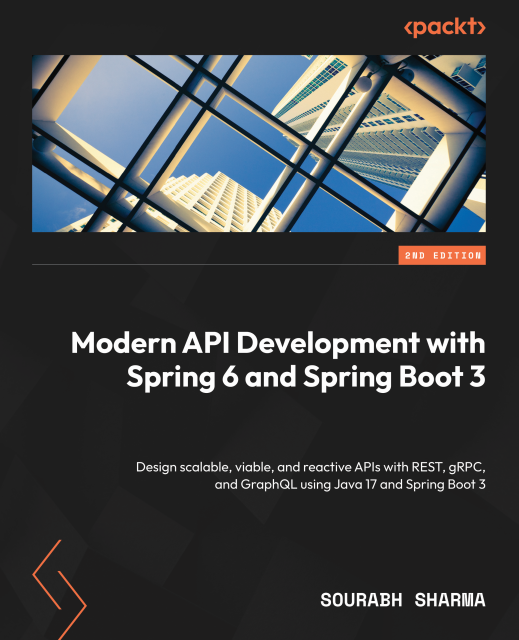
New Book Day: Modern API Development with Spring 6 and Spring Boot 3

The holiday season is close and it is time to resume and enhance my reading backlog. I wanted to get a break from infrastructure related topics and revisit some of my Spring REST API days.
I picked this book and it is a real treat. It focuses mainly on REST APIs but includes GRPC as well as GraphQL.
Obviously APIs are not anymore a hot topic but an essential topic. Unless you live under a rock, your daily work includes integrating with an API or involves something that integrates with an API.
You start with designing a REST API using the OpenAPI specification and then work towards the implementation of the REST API.
Then the book proceeds smoothly on consuming the API by implementing a front-end application, testing the API, containerising it, deploying it as well as monitoring it. This gives an end-to-end experience on implementing REST APIs with Spring.

As expected the essential topics such as security, JWT, HateOAS, database integrations, REST API best practices, testing and deploying to prod are covered. While going through the topics, I liked the opportunities the author gave to get back to the basics. There is a focus on designing REST APIs but for each technical aspect involved there is a deep dive like learning more on Spring, IoC containers, annotations, configuration modularisation, JPA as well as key components of Spring that help towards a REST API implementation.
Apart from that the book does not stick only to REST API implementation thus GraphQL and gRPC are also included.

For me a winner is the extras that come with the book
For example you get to use project Reactor and Webflux. Flyway for DB migrations is also included. Monitoring using the ELK stack is also included. Let alone that you get to integrate with Kubernetes using minikube.
Overall this book is complete and whether you are a seasoned professional or you get started with APIs in Spring, it’s a solid source of information.

In the next version it would be awesome to see topics such as rate limiting, mTLS, rest client implementation practises and a TDD approach on the examples.

Shoutout to Sourabh Sharma. Thank you for this book!
Read replicas and Spring Data Part 3: Configuring two entity managers

Our previous setup works as expected. What we shall do now is to get one step further and configure two separate entity managers without affecting the functionality we achieved previously.

The first step would be to set the default entity manager configuration to a primary one.
This is the first step

package com.gkatzioura.springdatareadreplica.config;

import javax.sql.DataSource;

import org.springframework.beans.factory.annotation.Qualifier;
import org.springframework.beans.factory.annotation.Value;
import org.springframework.boot.jdbc.DataSourceBuilder;
import org.springframework.boot.orm.jpa.EntityManagerFactoryBuilder;
import org.springframework.context.annotation.Bean;
import org.springframework.context.annotation.ComponentScan;
import org.springframework.context.annotation.Configuration;
import org.springframework.context.annotation.Primary;
import org.springframework.data.jpa.repository.config.EnableJpaRepositories;
import org.springframework.orm.jpa.LocalContainerEntityManagerFactoryBean;

@Configuration
public class PrimaryEntityManagerConfiguration {

    @Value("${spring.datasource.username}")
    private String username;

    @Value("${spring.datasource.password}")
    private String password;

    @Value("${spring.datasource.url}")
    private String url;

    @Bean
    @Primary
    public DataSource dataSource() throws Exception {
        return DataSourceBuilder.create()
                                .url(url)
                                .username(username)
                                .password(password)
                                .driverClassName("org.postgresql.Driver")
                                .build();
    }

    @Bean
    @Primary
    public LocalContainerEntityManagerFactoryBean entityManagerFactory(
            EntityManagerFactoryBuilder builder,
            @Qualifier("dataSource") DataSource dataSource) {
        return builder.dataSource(dataSource)
                      .packages("com.gkatzioura.springdatareadreplica")
                      .persistenceUnit("main")
                      .build();
    }

}

If you run your application with this configuration it will run just like our application previously.
Now it is time to configure the read only entity manager.

package com.gkatzioura.springdatareadreplica.config;

import javax.sql.DataSource;

import org.springframework.beans.factory.annotation.Qualifier;
import org.springframework.beans.factory.annotation.Value;
import org.springframework.boot.jdbc.DataSourceBuilder;
import org.springframework.boot.orm.jpa.EntityManagerFactoryBuilder;
import org.springframework.context.annotation.Bean;
import org.springframework.context.annotation.Primary;
import org.springframework.orm.jpa.LocalContainerEntityManagerFactoryBean;

@Configuration
public class ReadOnlyEntityManagerConfiguration {

    @Value("${spring.datasource.username}")
    private String username;

    @Value("${spring.datasource.password}")
    private String password;

    @Value("${spring.datasource.readUrl}")
    private String readUrl;

    @Bean
    public DataSource readDataSource() throws Exception {
        return DataSourceBuilder.create()
                                .url(readUrl)
                                .username(username)
                                .password(password)
                                .driverClassName("org.postgresql.Driver")
                                .build();
    }

    @Bean
    public LocalContainerEntityManagerFactoryBean readEntityManagerFactory(
            EntityManagerFactoryBuilder builder,
            @Qualifier("readDataSource") DataSource dataSource) {
        return builder.dataSource(dataSource)
                      .packages("com.gkatzioura.springdatareadreplica")
                      .persistenceUnit("read")
                      .build();
    }

}

Also I will add a method to a controller in order to save the models.

package com.gkatzioura.springdatareadreplica.controller;

import java.util.List;

import org.springframework.http.HttpStatus;
import org.springframework.web.bind.annotation.GetMapping;
import org.springframework.web.bind.annotation.PostMapping;
import org.springframework.web.bind.annotation.RequestBody;
import org.springframework.web.bind.annotation.ResponseStatus;
import org.springframework.web.bind.annotation.RestController;

import com.gkatzioura.springdatareadreplica.entity.Employee;
import com.gkatzioura.springdatareadreplica.repository.EmployeeRepository;

@RestController
public class EmployeeContoller {

    private final EmployeeRepository employeeRepository;

    public EmployeeContoller(EmployeeRepository employeeRepository) {
        this.employeeRepository = employeeRepository;
    }

    @GetMapping("/employee")
    public List<Employee> getEmployees() {
        return employeeRepository.findAll();
    }

    @PostMapping("/employee")
    @ResponseStatus(HttpStatus.CREATED)
    public void addEmployee(@RequestBody Employee employee) {
        employeeRepository.save(employee);
    }

}

If you do try to add the an employee using the controller and then query the read database you shall see that no entry is being added at all.

So we have our primary entity manager up and running and we also have a secondary one. The secondary one is not used yet. The next blog focuses on putting the secondary read only entity manager in use.

Read replicas and Spring Data Part 2: Configuring the base project

In our previous post we set up multiple PostgreSQL instances with the same data.
Our next step would be to configure our spring project by using the both servers.

As stated previously we shall use some of the code taken from the Spring Boot JPA post, since we use exactly the same database.

This shall be our gradle build file

plugins {
	id 'org.springframework.boot' version '2.1.9.RELEASE'
	id 'io.spring.dependency-management' version '1.0.8.RELEASE'
	id 'java'
}

group = 'com.gkatzioura'
version = '0.0.1-SNAPSHOT'
sourceCompatibility = '1.8'

repositories {
	mavenCentral()
}

dependencies {
	implementation 'org.springframework.boot:spring-boot-starter-data-jpa'
	implementation 'org.springframework.boot:spring-boot-starter-web'
	implementation "org.postgresql:postgresql:42.2.8"
	testImplementation 'org.springframework.boot:spring-boot-starter-test'
}

Now let’s proceed on creating the model based on the table created on the previous blog.

package com.gkatzioura.springdatareadreplica.entity;

import javax.persistence.Column;
import javax.persistence.Entity;
import javax.persistence.GeneratedValue;
import javax.persistence.GenerationType;
import javax.persistence.Id;
import javax.persistence.Table;

@Entity
@Table(name = "employee", catalog="spring_data_jpa_example")
public class Employee {

    @Id
    @Column(name = "id")
    @GeneratedValue(strategy = GenerationType.IDENTITY)
    private Long id;

    @Column(name = "firstname")
    private String firstName;

    @Column(name = "lastname")
    private String lastname;

    @Column(name = "email")
    private String email;

    @Column(name = "age")
    private Integer age;

    @Column(name = "salary")
    private Integer salary;

    public Long getId() {
        return id;
    }

    public void setId(Long id) {
        this.id = id;
    }

    public String getFirstName() {
        return firstName;
    }

    public void setFirstName(String firstName) {
        this.firstName = firstName;
    }

    public String getLastname() {
        return lastname;
    }

    public void setLastname(String lastname) {
        this.lastname = lastname;
    }

    public String getEmail() {
        return email;
    }

    public void setEmail(String email) {
        this.email = email;
    }

    public Integer getAge() {
        return age;
    }

    public void setAge(Integer age) {
        this.age = age;
    }

    public Integer getSalary() {
        return salary;
    }

    public void setSalary(Integer salary) {
        this.salary = salary;
    }

}

And the next step is to create a spring data repository.

package com.gkatzioura.springdatareadreplica.repository;

import org.springframework.data.jpa.repository.JpaRepository;
import com.gkatzioura.springdatareadreplica.entity.Employee;

public interface EmployeeRepository extends JpaRepository<Employee,Long> {
}

Also we are going to add a controller.

package com.gkatzioura.springdatareadreplica.controller;

import java.util.List;

import org.springframework.web.bind.annotation.RequestMapping;
import org.springframework.web.bind.annotation.RestController;

import com.gkatzioura.springdatareadreplica.entity.Employee;
import com.gkatzioura.springdatareadreplica.repository.EmployeeRepository;

@RestController
public class EmployeeContoller {

    private final EmployeeRepository employeeRepository;

    public EmployeeContoller(EmployeeRepository employeeRepository) {
        this.employeeRepository = employeeRepository;
    }

    @RequestMapping("/employee")
    public List<Employee> getEmployees() {
        return employeeRepository.findAll();
    }

}

All that it takes is to just add the right properties in you application.yaml

spring:
  datasource:
    platform: postgres
    driverClassName: org.postgresql.Driver
    username: db-user
    password: your-password
    url: jdbc:postgresql://127.0.0.2:5432/postgres

Spring boot has made it possible nowadays not to bother with any JPA configurations.

This is all you need in order to run the application. Once your application is running just try to fetch the employees.

curl http://localhost:8080/employee

As you have seen we did not do any JPA configuration. Since Spring Boot 2 specifying the database url is sufficient for the auto configuration to kick in and do all this configuration for you.

However in our case we want to have multiple datasource and entity manager configurations. In the next post we shall configure the entity managers for our application.

Read replicas and Spring Data Part 1: Configuring the Databases

This is a series of blog posts on our quest to increase our application’s performance by utilizing read replicas.

For this project our goal is to set up our spring data application and use read repositories for writes and
repositories based on read replicas for reads.

In order to simulate this environment we shall use PostgreSQL instances through Docker.

The motives are simple. Your Spring application has become increasingly popular and you want it to handle more requests. Most of the applications out there have a higher demand for read operations rather than write operations. Thus I assume that your application falls into the same category.
Although SQL databases are not horizontally scalable on their own, you can work you way with them by using read replicas.

Our goal is not to make an actual Read replication in PostgreSQL

thereforeinstead of configuring any replication

we will just copy some data from both databases

This is the script we shall use to populate the databases.

#!/bin/bash
set -e

psql -v ON_ERROR_STOP=1 --username "$POSTGRES_USER" --dbname "$POSTGRES_DB" &amp;lt;&amp;lt;-EOSQL
    create schema spring_data_jpa_example;

    create table spring_data_jpa_example.employee(
        id  SERIAL PRIMARY KEY,
        firstname   TEXT    NOT NULL,
        lastname    TEXT    NOT NULL,
        email       TEXT    not null,
        age         INT     NOT NULL,
        salary         real,
        unique(email)
    );

    insert into spring_data_jpa_example.employee (firstname,lastname,email,age,salary)
    values ('John','Doe 1','john1@doe.com',18,1234.23);
    insert into spring_data_jpa_example.employee (firstname,lastname,email,age,salary)
    values ('John','Doe 2','john2@doe.com',19,2234.23);
    insert into spring_data_jpa_example.employee (firstname,lastname,email,age,salary)
    values ('John','Doe 3','john3@doe.com',20,3234.23);
    insert into spring_data_jpa_example.employee (firstname,lastname,email,age,salary)
    values ('John','Doe 4','john4@doe.com',21,4234.23);
    insert into spring_data_jpa_example.employee (firstname,lastname,email,age,salary)
    values ('John','Doe 5','john5@doe.com',22,5234.23);
EOSQL

Since we shall use and Docker and Docker Compose the script above shall be used in order to initialize the database.
Now on to create our Docker Compose stack.

version: '3.5'

services:
  write-db:
    image: postgres
    restart: always
    environment:
      POSTGRES_USER: db-user
      POSTGRES_PASSWORD: your-password
      POSTGRES_DB: postgres
    networks:
      - postgresql-network
    ports:
      - "127.0.0.2:5432:5432"
    volumes:
      - $PWD/init-db-script.sh:/docker-entrypoint-initdb.d/init-db-script.sh
  read-db-1:
    image: postgres
    restart: always
    environment:
      POSTGRES_USER: db-user
      POSTGRES_PASSWORD: your-password
      POSTGRES_DB: postgres
    networks:
      - postgresql-network
    ports:
      - "127.0.0.3:5432:5432"
    volumes:
      - $PWD/init-db-script.sh:/docker-entrypoint-initdb.d/init-db-script.sh
networks:
  postgresql-network:
    name: postgresql-network

As you see our configuration is pretty simple. If you are careful enough you would see that I gave the number one to the read-db. This is because in the future we will add more replicas to it.

What I also did is bounding the machines to different local ips.

If you have problem binding addresses like 127.0.0.*:5432
You should try

sudo ifconfig lo0 alias 127.0.0.2 up
sudo ifconfig lo0 alias 127.0.0.3 up

If you are unsuccessful then just change the ports and it will work. It might not be as convenient but it’s still ok.

So let’s get up and running our Docker Compose stack.

docker-compose -f ./postgresql-stack.yaml up

We must be able to query data in both postgresql instances.

docker exec -it deploy_read-db-1_1 /bin/bash
root@07c502968cb3:/# psql -v --username "$POSTGRES_USER" --dbname "$POSTGRES_DB"
db-user=# select*from spring_data_jpa_example.employee;
 id | firstname | lastname |     email     | age | salary
----+-----------+----------+---------------+-----+---------
  1 | John      | Doe 1    | john1@doe.com |  18 | 1234.23
  2 | John      | Doe 2    | john2@doe.com |  19 | 2234.23
  3 | John      | Doe 3    | john3@doe.com |  20 | 3234.23
  4 | John      | Doe 4    | john4@doe.com |  21 | 4234.23
  5 | John      | Doe 5    | john5@doe.com |  22 | 5234.23
(5 rows)

We pretty much set up for our next step. We have some databases up and running and we are going to spin up a spring application running upon them. The next blog focuses on implementing an application running upon our primary database.

Fully working prototypes with Spring Boot and H2

We do use a lot of h2 with spring especially for unit tests. However instead of unit tests we might want to have a fully functional prototype with data to display.
H2 is the perfect candidate for that, it works great with spring, it has good syntax compatibility with most databases out there and it also provides you with a ui to check your data.

Imagine the scenario of an interview assignment. You want your example to work out of the box with as minimum as possible configuration for the reviewer.
The plan is to have an application up and running with some data.
Before accessing the application we might as well want to add some data to it. Then we need to have a proper way to display the data added without adding extra code.

The first step is to go to the spring initializr and add the Web and H2 dependencies. Also we shall add the jdbc property.

The end result will give a build.gradle file like this.

buildscript {
	ext {
		springBootVersion = '2.0.6.RELEASE'
	}
	repositories {
		mavenCentral()
	}
	dependencies {
		classpath("org.springframework.boot:spring-boot-gradle-plugin:${springBootVersion}")
	}
}

apply plugin: 'java'
apply plugin: 'eclipse'
apply plugin: 'org.springframework.boot'
apply plugin: 'io.spring.dependency-management'

group = 'com.gkatzioura.springbooth2'
version = '0.0.1-SNAPSHOT'
sourceCompatibility = 1.8

repositories {
	mavenCentral()
}

dependencies {
	implementation('org.springframework.boot:spring-boot-starter-jdbc')
	implementation('org.springframework.boot:spring-boot-starter-web')
	runtimeOnly('com.h2database:h2')
	testImplementation('org.springframework.boot:spring-boot-starter-test')
}

Since we added the jdbc property we can have some schema scripts executed once the application is started.
Thus we need to create a schema.sql file containing the sql statements which create the schema.

CREATE TABLE application_user (ID INT, USER_NAME VARCHAR(50), PASSWORD VARCHAR(255));
INSERT INTO application_user (ID,USER_NAME, PASSWORD) values (1,'test','password-hash');

The next step is to enable the h2 console. We will go with the yaml approach however you can do it either using a properties file or environment variables.

spring:
  h2:
    console:
      enabled: true

Now once we get our spring application running we can navigate at the http://localhost:8080/h2-console endpoint.
We shall be presented with the default credentials needed

Once we have logged in, we can query for the user we had inserted on our startup sql script.

Screen Shot 2018-11-05 at 07.36.20.png

That’s it! This can make wonders for prototypes, interview assignments and blog posts like this!

Spring Boot and Database initialization

Spring boot is hands down a great framework, saving the developer a lot of time and energy when developing a spring application.

One of its great features is database initialization.
You can use spring boot in order to initialize your sql database.

We will start with the gradle file

group 'com.gkatzioura'
version '1.0-SNAPSHOT'

apply plugin: 'java'

sourceCompatibility = 1.5

buildscript {
    repositories {
        mavenCentral()
    }
    dependencies {
        classpath("org.springframework.boot:spring-boot-gradle-plugin:1.3.3.RELEASE")
    }
}

apply plugin: 'idea'
apply plugin: 'java'
apply plugin: 'spring-boot'

repositories {
    mavenCentral()
} 

dependencies {
    compile("org.springframework.boot:spring-boot-starter-web") {
        exclude module: "spring-boot-starter-tomcat"
    }
    compile("org.springframework.boot:spring-boot-starter-jetty")
    compile("org.springframework:spring-jdbc")
    compile("org.springframework.boot:spring-boot-starter-actuator")
    compile("com.h2database:h2:1.4.191")
    testCompile group: 'junit', name: 'junit', version: '4.11'
}

Pay special attention to the org.springframework:spring-jdbc dependency. Actually this is the dependency that assists with the database initialization.
H2 database is more than enough for this example.

The applications main class

package com.gkatzioura.bootdatabaseinitialization;

import org.springframework.boot.SpringApplication;
import org.springframework.boot.autoconfigure.SpringBootApplication;
import org.springframework.context.ApplicationContext;

/**
 * Created by gkatzioura on 29/4/2016.
 */
@SpringBootApplication
public class Application {

    public static void main(String[] args) {

        SpringApplication springApplication = new SpringApplication();
        ApplicationContext applicationContext = springApplication.run(Application.class,args);
    }

}

The next step is to specify the datasource

package com.gkatzioura.bootdatabaseinitialization.config;

import org.h2.jdbcx.JdbcDataSource;
import org.springframework.context.annotation.Bean;
import org.springframework.context.annotation.Configuration;
import org.springframework.context.annotation.Primary;

import javax.naming.Context;
import javax.naming.InitialContext;
import javax.naming.NamingException;
import javax.sql.DataSource;

/**
 * Created by gkatzioura on 29/4/2016.
 */
@Configuration
public class DataSourceConfig {

    private static final String TEMP_DIRECTORY = System.getProperty("java.io.tmpdir");

    @Bean(name = "mainDataSource")
    public DataSource createMainDataSource() {

        JdbcDataSource ds = new JdbcDataSource();
        ds.setURL("jdbc:h2:"+TEMP_DIRECTORY+"/testdata;MODE=MySQL");
        return ds;
    }

}

We will add a schema.sql file to the resource folder so it would be loaded to classpath. The schema.sql file would contain all the table definitions needed for our database.

CREATE TABLE IF NOT EXISTS `Users` (
    `user_id` bigint(20) NOT NULL AUTO_INCREMENT,
    `name` varchar(200) NOT NULL,
    PRIMARY KEY (`user_id`)
);

Next file to add is data.sql on the resources folder. This file will contain the sql statements needed to populate our database.

INSERT INTO `Users` (`user_id`,`name`) VALUES (null,'nick');
INSERT INTO `Users` (`user_id`,`name`) VALUES (null,'george');

On initialization spring boot will search for the data.sql and schema.sql files and execute them with the Database initializer.

So far so good, however when you have two datasources defined, things get complicated.
We shall add a secondary datasource

package com.gkatzioura.bootdatabaseinitialization.config;

import org.h2.jdbcx.JdbcDataSource;
import org.springframework.context.annotation.Bean;
import org.springframework.context.annotation.Configuration;
import org.springframework.context.annotation.Primary;

import javax.naming.Context;
import javax.naming.InitialContext;
import javax.naming.NamingException;
import javax.sql.DataSource;

/**
 * Created by gkatzioura on 29/4/2016.
 */
@Configuration
public class DataSourceConfig {

    private static final String TEMP_DIRECTORY = System.getProperty("java.io.tmpdir");

    @Bean(name = "mainDataSource")
    public DataSource createMainDataSource() {

        JdbcDataSource ds = new JdbcDataSource();
        ds.setURL("jdbc:h2:"+TEMP_DIRECTORY+"/testdata;MODE=MySQL");
        return ds;
    }

    @Bean(name = "secondaryDataSource")
    public DataSource createSecondaryDataSource() {

        JdbcDataSource ds = new JdbcDataSource();
        ds.setURL("jdbc:h2:"+TEMP_DIRECTORY+"/secondarydata;MODE=MySQL");
        return ds;
    }
}

By starting the application we get an error

Caused by: org.springframework.beans.factory.NoUniqueBeanDefinitionException: No qualifying bean of type [javax.sql.DataSource] is defined: expected single matching bean but found 2: mainDataSource,secondaryDataSource

The problem is that the datasource initializer gets injected with a datasource. So we have to specify the datasource inject or else we will get an exception.
A workaround is to specify which datasource bean is the primary one.

    @Bean(name = "mainDataSource")
    @Primary
    public DataSource createMainDataSource() {

        JdbcDataSource ds = new JdbcDataSource();
        ds.setURL("jdbc:h2:"+TEMP_DIRECTORY+"/testdata;MODE=MySQL");
        return ds;
    }

By doing so the initializer will run the schema.sql and data.sql scripts using the mainDataSource bean.

Another great feature of spring boot database is initialization is that it can be integrated with flyway. Get more information on flyway here.

You can find the project source code here

Use stored procedures with Hibernate

This article shows different ways to call stored procedures from hibernate.
JDBC actions will not be covered.

Postgresql will be used as a database.

CREATE DATABASE example;

CREATE TABLE company (
  company_id BIGSERIAL PRIMARY KEY,
  name TEXT NOT NULL
);

CREATE TABLE benefit (
  benefit_id BIGSERIAL PRIMARY KEY,
  name TEXT,
  company_id BIGINT,
  CONSTRAINT fk_company FOREIGN KEY (company_id)
  REFERENCES company (company_id) MATCH SIMPLE
);

CREATE TABLE employee (
  employee_id BIGSERIAL PRIMARY KEY,
  first_name TEXT,
  last_name TEXT,
  company_id BIGINT,
  CONSTRAINT fk_company FOREIGN KEY (company_id)
    REFERENCES company (company_id) MATCH SIMPLE
);

CREATE TABLE employee_benefit (
  employee_id BIGINT,
  benefit_id BIGINT,
  CONSTRAINT fk_employee FOREIGN KEY (employee_id)
  REFERENCES employee (employee_id) MATCH SIMPLE ,
  CONSTRAINT fk_benefit FOREIGN KEY (benefit_id)
  REFERENCES benefit (benefit_id) MATCH SIMPLE
);

INSERT INTO company (name) VALUES ('TestCompany');
INSERT INTO employee (first_name, last_name, company_id) VALUES ('Emmanouil','Gkatziouras',1);
INSERT INTO benefit (name,company_id) VALUES ('gym',1);
INSERT INTO benefit (name,company_id) VALUES ('lunch',1);

Our postgresql function will return a set of employee benefits

CREATE OR REPLACE FUNCTION add_all_company_benefits(employeeId BIGINT,companyid BIGINT)
  RETURNS TABLE(benefit_id BIGINT,name TEXT,company_id BIGINT) AS $$
  DECLARE benefitid BIGINT;
  BEGIN

    FOR benefitid IN (SELECT benefit.benefit_id FROM benefit WHERE benefit.company_id=companyid) LOOP
      IF (SELECT COUNT(*) FROM employee_benefit as eb
            WHERE eb.employee_id=employeeid
            AND eb.benefit_id=benefitid) = 0
      THEN
        INSERT INTO employee_benefit (employee_id, benefit_id)
        VALUES (employeeId,benefitId);
      END IF;
    END LOOP;

    RETURN QUERY
    SELECT benefit.benefit_id,benefit.name,benefit.company_id FROM benefit
      INNER JOIN employee_benefit ON employee_benefit.benefit_id = benefit.benefit_id
      WHERE employee_benefit.employee_id=employeeId;
  END;
$$ LANGUAGE plpgsql;

The entity mappings using JPA annotations follow

The company entity.

package com.gkatzioura.example.entity;

import javax.persistence.*;
import java.util.HashSet;
import java.util.Set;

@Entity
@Table(name = "company")
public class Company {

    @Id
    @GeneratedValue
    @Column(name = "company_id")
    private Long Id;

    @Column
    String name;

    @OneToMany(cascade = CascadeType.ALL,fetch = FetchType.LAZY,mappedBy = "company")
    private Set<Benefit> benefits = new HashSet<Benefit>();

    public Long getId() {
        return Id;
    }

    public void setId(Long id) {
        Id = id;
    }

    public String getName() {
        return name;
    }

    public void setName(String name) {
        this.name = name;
    }

    public Set<Benefit> getBenefits() {
        return benefits;
    }

    public void setBenefits(Set<Benefit> benefits) {
        this.benefits = benefits;
    }
}

The employee entity.

package com.gkatzioura.example.entity;

import javax.persistence.*;

@Entity
@Table(name = "employee")
public class Employee {

    @Id
    @GeneratedValue
    @Column(name = "employee_id")
    private Long id;

    @Column(name = "first_name")
    private String firstName;

    @Column(name = "last_name")
    private String lastName;

    @ManyToOne(cascade = CascadeType.ALL,fetch = FetchType.LAZY)
    @JoinColumn(name = "company_id",referencedColumnName = "company_id")
    private Company company;

    public Long getId() {
        return id;
    }

    public void setId(Long id) {
        this.id = id;
    }

    public Company getCompany() {
        return company;
    }

    public void setCompany(Company company) {
        this.company = company;
    }

    public String getLastName() {
        return lastName;
    }

    public void setLastName(String lastName) {
        this.lastName = lastName;
    }

    public String getFirstName() {
        return firstName;
    }

    public void setFirstName(String firstName) {
        this.firstName = firstName;
    }
}

The benefit entity.

package com.gkatzioura.example.entity;

import javax.persistence.*;

@Entity
@Table(name = "benefit")
public class Benefit {

    @Id
    @GeneratedValue
    @Column(name = "benefit_id")
    private Long id;

    @Column(name = "name")
    private String name;

    @ManyToOne
    @JoinColumn(name = "company_id")
    private Company company;

    public String getName() {
        return name;
    }

    public void setName(String name) {
        this.name = name;
    }

    public Long getId() {
        return id;
    }

    public void setId(Long id) {
        this.id = id;
    }

    public Company getCompany() {
        return company;
    }

    public void setCompany(Company company) {
        this.company = company;
    }
}

Our first approach would be by calling the procedure as a hibernate sql query.

        Session session = sessionFactory.openSession();

        List<Company> companies = session.createCriteria(Company.class)
                .add(Restrictions.eq("name", companyName))
                .list();

        List<Employee> employees = session.createCriteria(Employee.class)
                .add(Restrictions.eq("firstName",employeeName))
                .list();

        for(Company company:companies) {

            for(Employee employee:employees) {

                LOGGER.info("The company is "+company.getId()+" the employee is "+employee.getId());

                SQLQuery query = (SQLQuery) session.createSQLQuery("SELECT*FROM add_all_company_benefits(:employeeId,:companyId)")
                        .addEntity(Benefit.class)
                        .setParameter("employeeId", employee.getId())
                        .setParameter("companyId", company.getId());


                List result = query.list();

                for(Integer i=0;i<result.size();i++) {

                    LOGGER.info("The benefit is "+((Benefit) result.get(i)).getName());
                }
            }
        }

        session.close();

We will update the company entity by adding a NameQuery in the company entity.

@Entity
@Table(name = "company")
@NamedNativeQueries({
        @NamedNativeQuery(
                name = "AddAllCompanyBenefits",
                query = "SELECT*FROM add_all_company_benefits(:employeeId,:companyId)",
                resultClass = Benefit.class
        )
})
public class Company {
}

Our hibernate actions will be refactored to

 
Query query = session.getNamedQuery("AddAllCompanyBenefits")
    .setParameter("employeeId", employee.getId())
    .setParameter("companyId", company.getId());

List result = query.list();

for(Integer i=0;i<result.size();i++) {
    LOGGER.info("The benefit is "+((Benefit) result.get(i)).getName());
}
 

Another way is to use hibernate’s ProcedureCall which is used on hibernate’s implementation of JPA’s StoredProcedureQuery


ProcedureCall procedureCall = session.createStoredProcedureCall("add_all_company_benefits");
procedureCall.registerParameter("EMPLOYEE", Long.class, ParameterMode.IN);
procedureCall.registerParameter("COMPANY", Long.class, ParameterMode.IN);
procedureCall.getParameterRegistration("EMPLOYEE").bindValue(employee.getId());
procedureCall.getParameterRegistration("COMPANY").bindValue(company.getId());                

ProcedureOutputs procedureOutputs = procedureCall.getOutputs();
ResultSetOutput resultSetOutput = (ResultSetOutput) procedureOutputs.getCurrent();


List results = resultSetOutput.getResultList();

for(Integer i=0;i<results.size();i++) {

    Object[] objects = (Object[]) results.get(i);

    LOGGER.info("The benefit is "+objects[1]);
}

JDBC basic actions.

This is a basic set of database actions when using jdbc.

Issuing queries with prepared statements

/**
 * Will fetch only one result
 */
public String justQuery() throws SQLException {
        Connection connection = null;
        PreparedStatement preparedStatement = null;
        try {
            connection = dataSource.getConnection();
            preparedStatement = connection.prepareStatement("SELECT a FROM abc");
            ResultSet resultSet = preparedStatement.executeQuery();
            String a = null;
            if(resultSet.next()) {
                a = resultSet.getString("a");
            }
            resultSet.close();
            return a;
        } finally {
            //Close the statements
            if(preparedStatement!=null) preparedStatement.close();
            //Relase the connection resource back to the pool
            if(connection!=null) connection.close();
        }
        
    }

Fetching more the one results.

/**
 * Fetching many results
 */
public List<Long> justQuery() throws SQLException {
        
        Connection connection = null;
        PreparedStatement preparedStatement = null;
        try {
            connection = dataSource.getConnection();
            preparedStatement = connection.prepareStatement("SELECT id FROM abc");
            ResultSet resultSet = preparedStatement.executeQuery();
            List<Long> ids = new ArrayList<>();
            if(resultSet.next()) {
                Long id = resultSet.getLong("id");
                ids.add(id);
            }
            resultSet.close();
            return ids;
        } finally {
            //Close the statements
            if(preparedStatement!=null) preparedStatement.close();
            //Relase the connection resource back to the pool
            if(connection!=null) connection.close();
        }
    }

Calling stored procedures with callable statements

public long callProcedure(String something) throws SQLException {
        
        Connection connection = null;
        CallableStatement callableStatement = null;
        try {
            connection = dataSource.getConnection();
            callableStatement = connection.prepareCall("CALL doSomething(?,?)");
            callableStatement.setString(1, something);
            callableStatement.registerOutParameter(2, Types.NUMERIC);
            callableStatement.execute();
            Long lastInsertId = callableStatement.getLong("resultvar");
            return lastInsertId;
        } finally {
            if(callableStatement!=null) callableStatement.close();
            //Release back to the connection pool
            if(connection!=null) connection.close();
        }   
    }

Batch processing

public void doBatchOpeation(List<Long> userIds) throws SQLException {
        Connection connection = null;
        Statement batchStmt = null;
        try {
            connection = DatasourceProvider.getConnection();
            batchStmt = connection.createStatement();
            for(Long userId:userIds) {
                batchStmt.addBatch("UPDATE user SET active=true WHERE userid="+userId);
            }
            batchStmt.executeBatch();
        } finally {
            if(batchStmt!=null) batchStmt.close();
            if(connection!=null) connection.close();
        }
    }

And last but not least transactions!!!

public void doTransaction(Long userId,BigDecimal ammount) throws SQLException{

        Connection connection = null;
        PreparedStatement insertStatemt = null;
        PreparedStatement updateStatement = null;
        
        try {
            connection = dataSource.getConnection();
            connection.setAutoCommit(false);

            insertStatemt = connection.prepareStatement("INSERT INTO transfers (USERID,AMMOUNT) VALUES (?,?)");
            insertStatemt.setLong(1, userId);
            insertStatemt.setBigDecimal(2, ammount);
            insertStatemt.executeUpdate();

            updateStatement = connection.prepareStatement("UPDATE user SET tnum=tnum+1 WHERE userid=?");
            updateStatement.setLong(1, userId);
            updateStatement.executeUpdate();
            
            //Don't forget to commit
            connection.commit();
            
        } catch (SQLException e) {
            if(connection!=null) {
                connection.rollback();
            } else throw e;
        } finally {
            if(insertStatemt!=null) insertStatemt.close();
            if(updateStatement!=null) updateStatement.close();
            if(connection!=null) {
                //Setting autocommit true before sending connection back to the pool
                connection.setAutoCommit(true);
                //And release the connection back to the pool
                connection.close();
            }
        }
    }

All in all using jdbc has a lot of boilerplate and also you have to be carefull. While many other frameworks like spring provide tools such as a transaction manager or jdbc template, when using jdbc you have to do everything on your own. You are responsible for everything, for example releasing the connections back to the pool or setting the connection back to autocommit mode.