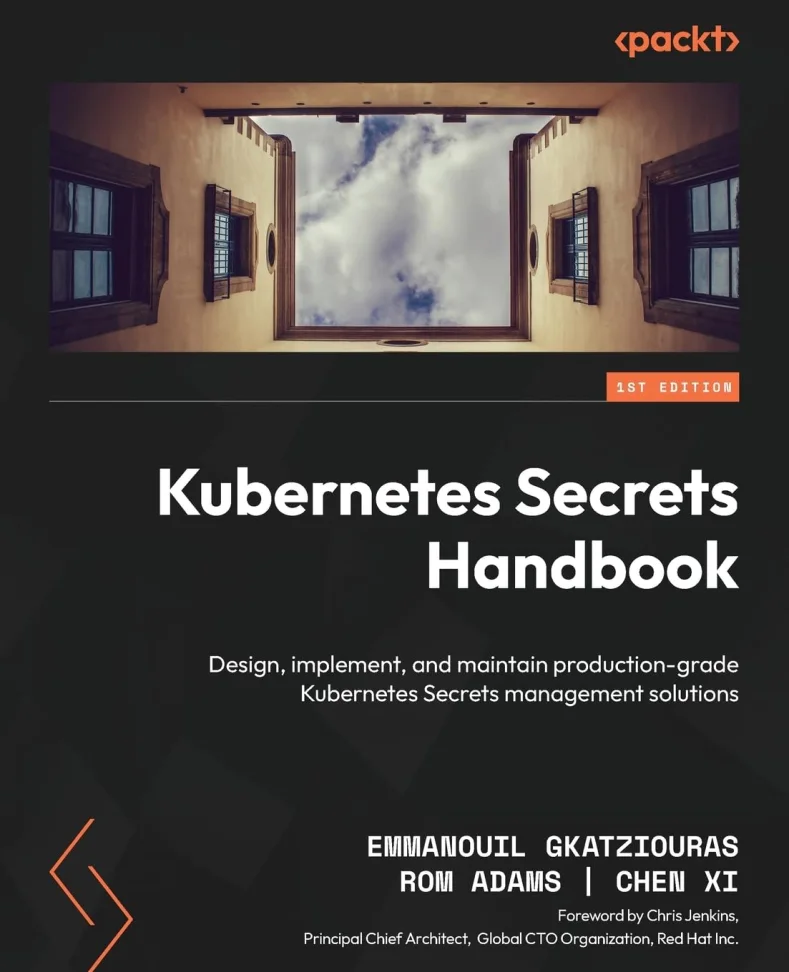
New Book Day: Kubernetes Secrets Handbook

Since 2015 when Kubernetes was released to the public there was continuous adoption from engineers and a huge progress in terms of tooling and features.  Kubernetes is the most popular container orchestration platform and this is due to various reasons:

  • It’s open source
  • Container based
  • It has a vibrant community
  • A reach ecosystem of extension and tools
  • Easiness of deployments and automation
  • Robustness
  • Scalability

A very important aspect on Kubernetes is secret management. You see when you get started with Kubernetes everything seems to work magically but then you start to wonder on security aspects.
Once you store and fetch a secret using the kubectl command several questions comes to mind.

  • Where is this secret stored
  • Is it encrypted
  • What are the minimum permissions to interact with the secrets
  • What happens on a datacenter outage
  • How safe I am on a disaster recovery scenario
  • What if I want to use the secret with non Kubernetes deployments
  • How my CI/CD interacts with secrets
  • How can I track any interaction with the secrets
  • How about integrating with my Cloud Platform
  • Am I limited to the etcd storage

Secrets management on Kubernetes is a huge topic by itself. For this reason Rom Adams Chen Xi and I embarked on the journey of authoring this book. Our goal was to make it easier for the Kubernetes users to identify the landscape around secrets management and also assist them in the technical choices they will have to make.

The book starts with an overview of Kubernetes, its architecture and design principles and how its components like etcd contribute secret storage. We focus on the different types of secrets and their applications on the various components of Kubernetes, for example the integration of a TLS secret with an Ingress. Another aspect tackled is securing the secrets using RBAC policies, by following the principle of least privilege. Then we focus on tracking down any interactions with secrets through Kubernetes Auditing.

Following the book focuses on encrypting the secrets the Kubernetes Native Way. The reader will learn on the default encryption providers that Kubernetes offers, cbc and gcm, and how Kubernetes can be configured to enable the encryption of secrets on etcd. Later we focus on hardening the system where the secrets reside physically. Following there is a section on troubleshooting secret provisioning issues and common mistakes to avoid.

We also focus on more advanced concepts. We expand on security and compliance and how to address the security concerns at the people, process, and technology levels. We expand on Disaster Recovery and Backups. Backup strategies to employ, tools that we can use and Disaster Recovery plans for Kubernetes. As we proceed we expand more on the security risks that come with secret management, the challenges that we have to tackle on different phases of secret management and the mitigation strategies for security risks.

The last part is fully focused on external secret providers. We focus on the ways that is feasible to use an external secrets providers such as secret injection or the utilisation of the Secrets Store CSI Driver.

We take a deep dive on Cloud Providers such as AWS, Azure, GCP and their secret storage offerings. We get to deploy Kubernetes clusters to the cloud and integrate them with the available secret stores. We focus on disaster recovery capabilities and the resiliency offered in these solutions. Furthermore we focus on observability, monitoring and auditing of secrets in the cloud. We also make sure that we follow the permission of least privilege, and provide fine grained IAM policies. Apart from focusing on the usage of external secret providers we will also examine the usage of the Key Management Systems (KMS) provided from the cloud providers and how we can integrate them with our Kubernetes installation in order to encrypt secrets.

Following we focus on external solutions such as HashiCorp Vault and Conjur. We examine how they work behind the scenes, how they ensure the security of the secrets as well as other important topics such as resiliency, logging, monitoring and disaster recovery. We examine their integration with Kubernetes and how they help us when it comes to secrets management.

Finally we wrap up on cases studies of secret management, CI/CD practises and discuss the future of Kubernetes Secrets Management.

I am really proud of this book and I believe it gives lots of value to the reader. It is a great source of information on Kubernetes Secrets but also it provides a very hands on experience.

You can find the book on Amazon as well as on the Packt portal.

Happy reading!!!


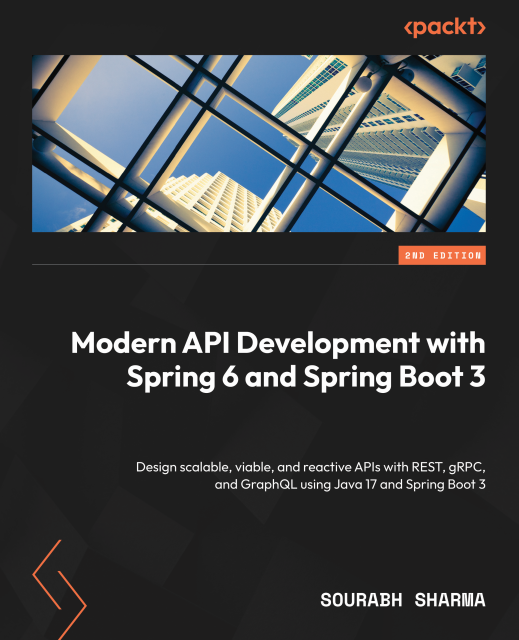
New Book Day: Modern API Development with Spring 6 and Spring Boot 3

The holiday season is close and it is time to resume and enhance my reading backlog. I wanted to get a break from infrastructure related topics and revisit some of my Spring REST API days.
I picked this book and it is a real treat. It focuses mainly on REST APIs but includes GRPC as well as GraphQL.
Obviously APIs are not anymore a hot topic but an essential topic. Unless you live under a rock, your daily work includes integrating with an API or involves something that integrates with an API.
You start with designing a REST API using the OpenAPI specification and then work towards the implementation of the REST API.
Then the book proceeds smoothly on consuming the API by implementing a front-end application, testing the API, containerising it, deploying it as well as monitoring it. This gives an end-to-end experience on implementing REST APIs with Spring.

As expected the essential topics such as security, JWT, HateOAS, database integrations, REST API best practices, testing and deploying to prod are covered. While going through the topics, I liked the opportunities the author gave to get back to the basics. There is a focus on designing REST APIs but for each technical aspect involved there is a deep dive like learning more on Spring, IoC containers, annotations, configuration modularisation, JPA as well as key components of Spring that help towards a REST API implementation.
Apart from that the book does not stick only to REST API implementation thus GraphQL and gRPC are also included.

For me a winner is the extras that come with the book
For example you get to use project Reactor and Webflux. Flyway for DB migrations is also included. Monitoring using the ELK stack is also included. Let alone that you get to integrate with Kubernetes using minikube.
Overall this book is complete and whether you are a seasoned professional or you get started with APIs in Spring, it’s a solid source of information.

In the next version it would be awesome to see topics such as rate limiting, mTLS, rest client implementation practises and a TDD approach on the examples.

Shoutout to Sourabh Sharma. Thank you for this book!

New Book Day: A Developer’s Essential Guide to Docker Compose

As Developers nowadays we have a wide variety of Software components and Cloud Services to use. This was a scenario that we could not even imagine in the past.
I still remember when we had to setup our Application Servers and Databases on top of Bare metal servers.
This burst of computing functionality in the form of the Cloud and managed services, allowed us to be able to utilise more tools for our applications and build better products.
Issues like orchestrating workloads, isolating and shipping them went to a whole different level.
As a result containerization came to the rescue.
Docker took over the microservice world and became the dominant solution to deploy microservices and in certain cases even to deploy Databases and Brokers.
This brings us to the development process. Production deployments is a huge chapter on its own. Platform engineers needs to take care of the security, the scaling and robustness of container based deployments.
But the development process is also affected:

  • SQL/NoSQL Databases as well as purpose-built databases like InfluxDB need to be available locally
  • Scenarios of Microservices applications need to be tested
  • Other Components such as brokers need to be available for testing

A step forward to the challenges mentioned above is to utilise Docker and its rich functionality. As convenient as it is to spin up containers locally you still end up managing containers, volumes and networks. Most of the times those have been spinned up add-hoc or with some scripts that a team has to maintain.

Docker Compose is one of the solutions to the problems described. With Compose you can spin up multiple containers locally organised using yaml files.
Here are some of the benefits when used during development:

  • The containers are organised and can spin up or shut down in an organized way
  • Applications can be placed on different networks
  • Volumes can be managed and attached to containers in a managed way
  • Containers resolve each other’s location through a DNS automatically, manual linking is not needed.

I have been using Compose for years. It helped me to make my development process much more efficient. Also in certain cases it helped me on actual production deployments. Writing this book was an opportunity for me to advocate for Docker Compose.


Thanks to the amazing people at Packt publishing it was possible to write this book and give back to the community.

The book is focused on various aspects of Compose.

In the beginning it will be an extensive look on Docker Compose, how it is implemented, how it interacts with the Docker engine, the available commands as well as the functionality it provides.

Onwards we will dive deep in day to day development using Compose. We will spin up complex infrastructure locally, as well as simulate Microservice environments using Compose. We will take this concept further and incrementally simulate things that we have to deal with a production deployment, as well as issue workarounds. Lastly we will use Compose for CI/CD jobs on popular solutions like Github Actions, Travis, and BitBucket Pipelines.

The last part of the book is all about deploying to production. All the knowledge acquired previously can be used for actual production deployments. A production deployment comes with some standards:

  • Infrastructure as Code
  • Container registry
  • Networks
  • Load Balancing
  • Autoscaling

The above, in combination with the knowledge we accumulated so far using Compose, will be used for a deployment on AWS and Azure, the most popular Cloud providers. This will be done also with the extra help of Infrastructure as Code by using Terraform.

Lastly since many production deployments nowadays reside on Kubernetes we shall build a bridge between Compose and Kubernetes by migrating the existing Compose deployment using Kompose.

You can find the book on Amazon  as well as on the Packt portal.
Happy Learning!

Kubernetes pod as a Bastion Host

In Cloud Native apps private networks, databases and services are a reality.

An infrastructure can be fully private and only a limited number of entry points can be available.

Obviously the more restricted the better.

Still there are cases where there has not been any infrastructure setup for the private services and ways to link towards them. however if there is access through Kubernetes, HAProxy can help.

HAProxy can accept a configuration file. Uploading that file as a configmap and then mount the configmap to a Kubernetes pod will be easy. Then the HAProxy Kubernetes pod will be able to spin up using that configuration and thus establish a proxy connection.

Let’s start with the ha-proxy configuration. The target would be a MySQL database with a private IP.

 
apiVersion: v1
data:
  haproxy.cfg: |-
    global
    defaults
        timeout client          30s
        timeout server          30s
        timeout connect         30s

    frontend frontend
        bind    0.0.0.0:3306
        default_backend backend

    backend backend
        mode                    tcp
        server upstream 10.0.1.7:3306
kind: ConfigMap
metadata:
  creationTimestamp: null
  name: mysql-haproxy-port-forward

On the upstream we just add the ip and the port of the db, on the frontend we specify the local port and address we shall use.

By doing the above we have a way to mount the config file to our Kubernetes pod.

Now let’s create the pod

 
apiVersion: v1
kind: Pod
metadata:
  creationTimestamp: null
  labels:
    run: mysql-forward-pod
  name: mysql-forward-pod
spec:
  containers:
    - command:
      - haproxy
      - -f
      - /usr/local/etc/haproxy/haproxy.cfg
      - -V
      image: haproxy:1.7-alpine
      name: mysql-forward-pod
      resources: {}
      volumeMounts:
        - mountPath: /usr/local/etc/haproxy/
          name: mysql-haproxy-port-forward
  dnsPolicy: ClusterFirst
  restartPolicy: Always
  volumes:
    - name: mysql-haproxy-port-forward
      configMap:
        name: mysql-haproxy-port-forward
status: {}

On the volume section we set the configmap as a volume. On the container section we mount the configmap to a path thus having access to the file.
We use a HAProxy image, and we provide the command to start HAProxy using the file we mounted before.

To test that it works, use a kubectl session that has port-forward permissions and do

 
kubectl port-forward  mysql-forward-pod 3306:3306

You shall be able to access mysql from your localhost.

Apache Ignite and Spring on your Kubernetes Cluster Part 3: Testing the application

On the previous blog we created our Kubernetes deployment files for our Ignite application. On this blog we shall deploy our Ignite application on Kubernetes. I will use minikube on this.

Let’s build first

mvn clean install

I shall create a simple docker image, thus a Dockerfile is neeeded.
Let’s add a Dockerfile to the root of our project.

FROM adoptopenjdk/openjdk11

COPY target/job-api-ignite-0.0.1-SNAPSHOT.jar app.jar

ENTRYPOINT ["java","-jar","app.jar"]

Now we want to deploy this to our local Κubernetes. Follow this guide on how to use local images on Kubernetes.

Then let’s build our app

docker build -f Dockerfile -t job-api:1.0 .

Time to apply our Kubernetes yaml files.

kubectl apply -f job-cache-rbac.yaml
kubectl apply -f job-api-deployment.yaml
kubectl apply -f job-api-service.yaml

Give it some time and check your pods

> kubectl get pods
NAME                                  READY   STATUS    RESTARTS   AGE
job-api-deployment-86f54c9d75-dpnsc   1/1     Running   0          11m
job-api-deployment-86f54c9d75-xj267   1/1     Running   0          11m

Let’s issue a request through the first pod. This request will reach github and then shall cache the results in memory.

kubectl exec -it job-api-deployment-86f54c9d75-dpnsc -- curl localhost:8080/jobs/github/1

Then we shall use the other endpoint in order to fetch data straight from ignite.

kubectl exec -it job-api-deployment-86f54c9d75-xj267 -- curl localhost:8080/jobs/github/ignite/1

So we are successful, which means that our Ignite cluster is running in our Kubernetes workloads. The data are cached and shared between the nodes.

You can find the code on GitHub.

Apache Ignite and Spring on your Kubernetes Cluster Part 2: Kubernetes deployment

Previously we have been successful on creating our first Spring boot Application powered by Apache Ignite.

On this blog we shall focus on what is needed to be done on the Kubernetes side in order to be able to spin up our application.

As described on a previous blog we need to have our Kubernetes RBAC policies in place.

We need a role, a service account and the binding.

apiVersion: rbac.authorization.k8s.io/v1
kind: ClusterRole
metadata:
  name: job-cache
rules:
  - apiGroups:
    - ""
    resources:
    - pods
    - endpoints
    verbs:
    - get
    - list
    - watch
---
apiVersion: v1
kind: ServiceAccount
metadata:
  name: job-cache
---
apiVersion: rbac.authorization.k8s.io/v1
kind: ClusterRoleBinding
metadata:
  creationTimestamp: 2020-03-07T22:23:50Z
  name: job-cache
roleRef:
  apiGroup: rbac.authorization.k8s.io
  kind: ClusterRole
  name: job-cache
subjects:
  - kind: ServiceAccount
    name: job-cache
    namespace: "default"

Our service account will be the job cache. This means that we should use the job-cache service account for our Ignite based workloads.

The next step is to create the deployment. The configuration would not be very different from statefulset as explained in a previous post.

apiVersion: apps/v1
kind: Deployment
metadata:
  name: job-api-deployment
  labels:
    app: job-api
spec:
  replicas: 2
  selector:
    matchLabels:
      app: job-api
  template:
    metadata:
      labels:
        app: job-api
    spec:
      containers:
        - name: job-api
          image: job-api:1.0
          env:
            - name: IGNITE_QUIET
              value: "false"
            - name: IGNITE_CACHE_CLIENT
              value: "false"
          ports:
            - containerPort: 11211
              protocol: TCP
            - containerPort: 47100
              protocol: TCP
            - containerPort: 47500
              protocol: TCP
            - containerPort: 49112
              protocol: TCP
            - containerPort: 10800
              protocol: TCP
            - containerPort: 8080
              protocol: TCP
            - containerPort: 10900
              protocol: TCP
      serviceAccount: job-cache
      serviceAccountName: job-cache

This is simpler since the Ignite configuration has been done through Java code.
The image that you see is supposed to be your dockerised Java application we worked before.
The next big step is to define the service. I will not use one service for all. Instead I would create a service for the cache and a service for our api in order to be used as an api.

apiVersion: v1
kind: Service
metadata:
  labels:
    app: job-cache
  name: job-cache
spec:
  ports:
    - name: jdbc
      port: 11211
      protocol: TCP
      targetPort: 11211
    - name: spi-communication
      port: 47100
      protocol: TCP
      targetPort: 47100
    - name: spi-discovery
      port: 47500
      protocol: TCP
      targetPort: 47500
    - name: jmx
      port: 49112
      protocol: TCP
      targetPort: 49112
    - name: sql
      port: 10800
      protocol: TCP
      targetPort: 10800
    - name: rest
      port: 8080
      protocol: TCP
      targetPort: 8080
    - name: thin-clients
      port: 10900
      protocol: TCP
      targetPort: 10900
  selector:
    app: job-api
  type: ClusterIP

Without getting into kubernetes details, the Ignite nodes shall synchronize using the job-cache internal dns. So we shall use kubernetes internal dns capabilities to communicate with the Ignite cluster.

The next step is to create the service for the actual job api application.

apiVersion: v1
kind: Service
metadata:
  labels:
    app: job-api
  name: job-api
spec:
  ports:
    - name: rest-api
      port: 80
      protocol: TCP
      targetPort: 8080
  selector:
    app: job-api
  sessionAffinity: None
  type: ClusterIP

Οn the following blog we shall apply our configurations to kubernetes and test our codebase.

Apache Ignite and Spring on your Kubernetes Cluster Part 1: Spring Boot application

On a previous series of blogs we spun up an Ignite cluster on a Kubernetes cluster.
In this tutorial we shall use the Ignite cluster created previously on with a Spring Boot Application.


Let’s create our project using Spring Boot. The Spring Boot application will connect to the Ignite cluster.

Let’s add our dependencies.

<?xml version="1.0" encoding="UTF-8"?>
<project xmlns="http://maven.apache.org/POM/4.0.0" xmlns:xsi="http://www.w3.org/2001/XMLSchema-instance" xsi:schemaLocation="http://maven.apache.org/POM/4.0.0 https://maven.apache.org/xsd/maven-4.0.0.xsd">
	<modelVersion>4.0.0</modelVersion>
	<parent>
		<groupId>org.springframework.boot</groupId>
		<artifactId>spring-boot-starter-parent</artifactId>
		<version>2.2.5.RELEASE</version>
		<relativePath/> <!-- lookup parent from repository -->
	</parent>
	<groupId>com.gkatzioura</groupId>
	<artifactId>job-api-ignite</artifactId>
	<version>0.0.1-SNAPSHOT</version>
	<name>job-api-ignite</name>
	<description>Demo project for Spring Boot</description>

	<properties>
		<java.version>1.8</java.version>
	</properties>

	<dependencies>
		<dependency>
			<groupId>org.springframework.boot</groupId>
			<artifactId>spring-boot-starter-cache</artifactId>
		</dependency>
		<dependency>
			<groupId>org.springframework.boot</groupId>
			<artifactId>spring-boot-starter-web</artifactId>
		</dependency>
		<dependency>
			<groupId>org.apache.ignite</groupId>
			<artifactId>ignite-kubernetes</artifactId>
			<version>2.7.6</version>
		</dependency>
		<dependency>
			<groupId>org.apache.ignite</groupId>
			<artifactId>ignite-spring</artifactId>
			<version>2.7.6</version>
			<exclusions>
				<exclusion>
					<groupId>org.apache.ignite</groupId>
					<artifactId>ignite-indexing</artifactId>
				</exclusion>
			</exclusions>
		</dependency>
		<dependency>
			<groupId>org.projectlombok</groupId>
			<artifactId>lombok</artifactId>
			<version>1.18.12</version>
			<scope>provided</scope>
		</dependency>
		<dependency>
			<groupId>org.springframework.boot</groupId>
			<artifactId>spring-boot-starter-test</artifactId>
			<scope>test</scope>
			<exclusions>
				<exclusion>
					<groupId>org.junit.vintage</groupId>
					<artifactId>junit-vintage-engine</artifactId>
				</exclusion>
			</exclusions>
		</dependency>
	</dependencies>

	<build>
		<plugins>
			<plugin>
				<groupId>org.springframework.boot</groupId>
				<artifactId>spring-boot-maven-plugin</artifactId>
			</plugin>
		</plugins>
	</build>

</project>

As in previous tutorials we shall use GitHub’s Job api.

The first step would be to add the Job Model that deserializes.

package com.gkatzioura.jobapi.model;

import java.io.Serializable;

import lombok.Data;

@Data
public class Job implements Serializable {

	private String id;
	private String type;
	private String url;
	private String createdAt;
	private String company;
	private String companyUrl;
	private String location;
	private String title;
	private String description;

}

The we need a repository for the Jobs. Beware the class needs to be serializable. Ignite caches data off-heap.

package com.gkatzioura.jobapi.repository;

import java.util.ArrayList;
import java.util.List;

import com.gkatzioura.jobapi.model.Job;
import lombok.Data;
import org.apache.ignite.Ignite;

import org.springframework.cache.annotation.Cacheable;
import org.springframework.stereotype.Repository;
import org.springframework.web.client.RestTemplate;

@Repository
public class GitHubJobRepository {

	private static final String JOB_API_CONSTANST = "https://jobs.github.com/positions.json?page={page}";
	public static final String GITHUBJOB_CACHE = "githubjob";

	private final RestTemplate restTemplate;
	private final Ignite ignite;

	GitHubJobRepository(Ignite ignite) {
		this.restTemplate = new RestTemplate();
		this.ignite = ignite;
	}

	@Cacheable(value = GITHUBJOB_CACHE)
	public List<Job> getJob(int page) {
		return restTemplate.getForObject(JOB_API_CONSTANST,JobList.class,page);
	}

	public List<Job> fetchFromIgnite(int page) {
		for(String cache: ignite.cacheNames()) {
			if(cache.equals(GITHUBJOB_CACHE)) {
				return (List<Job>) ignite.getOrCreateCache(cache).get(1);
			}
		}

		return new ArrayList<>();
	}

	@Data
	private static class JobList  extends ArrayList<Job> {
	}
}

The main reason the JobList class exists is for convenience for unmarshalling.
As you can see the repository has the annotation @Cacheable. This mean that our requests will be cached. The fetchFromIgnite method is a test method for the sake of this example. We shall use it to access the data cached by ignite directly.

We shall also add the controller.

package com.gkatzioura.jobapi.controller;

import java.util.List;

import com.gkatzioura.jobapi.model.Job;
import com.gkatzioura.jobapi.repository.GitHubJobRepository;
import org.springframework.web.bind.annotation.GetMapping;
import org.springframework.web.bind.annotation.PathVariable;
import org.springframework.web.bind.annotation.RequestMapping;
import org.springframework.web.bind.annotation.RestController;

@RestController
@RequestMapping("/jobs")
public class JobsController {

	private final GitHubJobRepository gitHubJobRepository;

	JobsController(GitHubJobRepository gitHubJobRepository) {
		this.gitHubJobRepository = gitHubJobRepository;
	}

	@GetMapping("/github/{page}")
	public List<Job> gitHub(@PathVariable("page") int page) {
		return this.gitHubJobRepository.getJob(page);
	}

	@GetMapping("/github/ignite/{page}")
	public List<Job> gitHubIgnite(@PathVariable("page") int page) {
		return this.gitHubJobRepository.fetchFromIgnite(page);
	}

}

Two methods on the controller, the one to fetch the data as usual and caches them behind the scenes and the other on that we shall use for testing.

It’s time for us to configure the Ignite client that uses the nodes on our Kubernetes cluster.

package com.gkatzioura.jobapi.config;


import lombok.extern.slf4j.Slf4j;
import org.apache.ignite.Ignite;
import org.apache.ignite.Ignition;
import org.apache.ignite.cache.spring.SpringCacheManager;
import org.apache.ignite.configuration.IgniteConfiguration;
import org.apache.ignite.spi.discovery.tcp.TcpDiscoverySpi;
import org.apache.ignite.spi.discovery.tcp.ipfinder.kubernetes.TcpDiscoveryKubernetesIpFinder;

import org.springframework.cache.annotation.EnableCaching;
import org.springframework.context.annotation.Bean;
import org.springframework.context.annotation.Configuration;

@Configuration
@EnableCaching
@Slf4j
public class SpringCacheConfiguration {

	@Bean
	public Ignite igniteInstance() {
		log.info("Creating ignite instance");
		TcpDiscoveryKubernetesIpFinder tcpDiscoveryKubernetesIpFinder = new TcpDiscoveryKubernetesIpFinder();
		tcpDiscoveryKubernetesIpFinder.setNamespace("default");
		tcpDiscoveryKubernetesIpFinder.setServiceName("job-cache");

		TcpDiscoverySpi tcpDiscoverySpi = new TcpDiscoverySpi();
		tcpDiscoverySpi.setIpFinder(tcpDiscoveryKubernetesIpFinder);

		IgniteConfiguration igniteConfiguration = new IgniteConfiguration();

		igniteConfiguration.setDiscoverySpi(tcpDiscoverySpi);
		igniteConfiguration.setClientMode(false);

		return Ignition.start(igniteConfiguration);
	}

	@Bean
	public SpringCacheManager cacheManager(Ignite ignite) {
		SpringCacheManager springCacheManager =new SpringCacheManager();
		springCacheManager.setIgniteInstanceName(ignite.name());
		return springCacheManager;
	}

}

We created our cache. It shall use the Kubernetes TCP discovery mode.

The next step is to add our Main class.

package com.gkatzioura.jobapi;

import org.springframework.boot.SpringApplication;
import org.springframework.boot.autoconfigure.SpringBootApplication;
import org.springframework.cache.annotation.EnableCaching;

@SpringBootApplication
@EnableCaching
public class IgniteKubeClusterApplication {

	public static void main(String[] args) {
		SpringApplication.run(IgniteKubeClusterApplication.class, args);
	}

}

The next blog will be focused on shipping the solution to kubernetes.

Apache Ignite on your Kubernetes Cluster Part 4: Deployment explained

Previously we saw the Ignite configuration that comes with the Kubernetes installation.
The default configuration does not have persistence enabled so we won’t focus on any storage classes provided by the helm chart.

The default installation uses a stateful set. You can find more information on a stateful set on the Kubernetes documentation.

> kubectl get statefulset ignite-cache -o yaml
apiVersion: apps/v1
kind: StatefulSet
metadata:
  creationTimestamp: 2020-04-09T12:29:04Z
  generation: 1
  labels:
    app.kubernetes.io/instance: ignite-cache
    app.kubernetes.io/managed-by: Helm
    app.kubernetes.io/name: ignite
    helm.sh/chart: ignite-1.0.1
  name: ignite-cache
  namespace: default
  resourceVersion: "281390"
  selfLink: /apis/apps/v1/namespaces/default/statefulsets/ignite-cache
  uid: fcaa7bef-84cd-4e7c-aa33-a4312a1d47a9
spec:
  podManagementPolicy: OrderedReady
  replicas: 2
  revisionHistoryLimit: 10
  selector:
    matchLabels:
      app: ignite-cache
  serviceName: ignite-cache
  template:
    metadata:
      creationTimestamp: null
      labels:
        app: ignite-cache
    spec:
      containers:
      - env:
        - name: IGNITE_QUIET
          value: "false"
        - name: JVM_OPTS
          value: -Djava.net.preferIPv4Stack=true
        - name: OPTION_LIBS
          value: ignite-kubernetes,ignite-rest-http
        image: apacheignite/ignite:2.7.6
        imagePullPolicy: IfNotPresent
        name: ignite
        ports:
        - containerPort: 11211
          protocol: TCP
        - containerPort: 47100
          protocol: TCP
        - containerPort: 47500
          protocol: TCP
        - containerPort: 49112
          protocol: TCP
        - containerPort: 10800
          protocol: TCP
        - containerPort: 8080
          protocol: TCP
        - containerPort: 10900
          protocol: TCP
        resources: {}
        terminationMessagePath: /dev/termination-log
        terminationMessagePolicy: File
        volumeMounts:
        - mountPath: /opt/ignite/apache-ignite/config
          name: config-volume
      dnsPolicy: ClusterFirst
      restartPolicy: Always
      schedulerName: default-scheduler
      securityContext: {}
      serviceAccount: ignite-cache
      serviceAccountName: ignite-cache
      terminationGracePeriodSeconds: 30
      volumes:
      - configMap:
          defaultMode: 420
          items:
          - key: ignite-config.xml
            path: default-config.xml
          name: ignite-cache-configmap
        name: config-volume
  updateStrategy:
    rollingUpdate:
      partition: 0
    type: RollingUpdate
status:
  replicas: 0

As you can see the Ingite configuration has been mounted through the configmap. Also you can see that this pod will use a specific service account.
Through the environment variables certain libraries are enabled which provide more features on the Ignite cluster. Also the ports needed for the communication and various protocols are being specified.

The last step is the service. All the ignite nodes shall be load balancer behind the Kubernetes service.

> kubectl get svc ignite-cache -o yaml
apiVersion: v1
kind: Service
metadata:
  creationTimestamp: 2020-04-09T12:29:04Z
  labels:
    app: ignite-cache
  name: ignite-cache
  namespace: default
  resourceVersion: "281389"
  selfLink: /api/v1/namespaces/default/services/ignite-cache
  uid: 5be68e28-a57c-4cb5-b610-b708bff80da7
spec:
  clusterIP: None
  ports:
  - name: jdbc
    port: 11211
    protocol: TCP
    targetPort: 11211
  - name: spi-communication
    port: 47100
    protocol: TCP
    targetPort: 47100
  - name: spi-discovery
    port: 47500
    protocol: TCP
    targetPort: 47500
  - name: jmx
    port: 49112
    protocol: TCP
    targetPort: 49112
  - name: sql
    port: 10800
    protocol: TCP
    targetPort: 10800
  - name: rest
    port: 8080
    protocol: TCP
    targetPort: 8080
  - name: thin-clients
    port: 10900
    protocol: TCP
    targetPort: 10900
  selector:
    app: ignite-cache
  sessionAffinity: None
  type: ClusterIP
status:
  loadBalancer: {}

Whether you add a new node or you add an ignite client node your ignite cluster shall be reached through this Kubernetes service. Apart from, that based on the Kubernetes services you can make this cache public or internal.

Apache Ignite on your Kubernetes Cluster Part 3: Configuration explained

Previously we had a look on the RBAC needed for and ignite cluster in Kubernetes.
This blogs focuses on the deployment and the configuration of the cache.

The default ignite installation uses and xml based configuration. It is easy to mount files using configmaps.

> kubectl get configmap ignite-cache-configmap -o yaml
NAME                     DATA   AGE
ignite-cache-configmap   1      32d
gkatzioura@MacBook-Pro-2 templates % kubectl get configmap ignite-cache-configmap -o yaml
apiVersion: v1
data:
  ignite-config.xml: "....\n"
kind: ConfigMap
metadata:
  creationTimestamp: 2020-03-07T22:23:50Z
  name: ignite-cache-configmap
  namespace: default
  resourceVersion: "137521"
  selfLink: /api/v1/namespaces/default/configmaps/ignite-cache-configmap
  uid: ff530e3d-10d6-4708-817f-f9845886c1b0

Since viewing the xml from the configmap is cumbersome this is the actual xml

<?xml version="1.0" encoding="UTF-8"?>
<beans xmlns="http://www.springframework.org/schema/beans"
	   xmlns:xsi="http://www.w3.org/2001/XMLSchema-instance" xsi:schemaLocation="
		       http://www.springframework.org/schema/beans        http://www.springframework.org/schema/beans/spring-beans.xsd">
	<bean class="org.apache.ignite.configuration.IgniteConfiguration">
		<property
				name="peerClassLoadingEnabled" value="false"/>
		<property name="dataStorageConfiguration">
			<bean class="org.apache.ignite.configuration.DataStorageConfiguration">
			</bean>
		</property>
		<property
				name="discoverySpi">
			<bean class="org.apache.ignite.spi.discovery.tcp.TcpDiscoverySpi">
				<property name="ipFinder">
					<bean class="org.apache.ignite.spi.discovery.tcp.ipfinder.kubernetes.TcpDiscoveryKubernetesIpFinder">
						<property name="namespace" value="default"/>
						<property
								name="serviceName" value="ignite-cache"/>
					</bean>
				</property>
			</bean>
		</property>
	</bean>
</beans>

The default DataStorageConfiguration is being used.
What you can see different from other ignite installations is TCP discovery. The tcp discover used is using the Kubernetes TCP based discovery.

The next blog focuses on the services and the deployment.

Apache Ignite on your Kubernetes Cluster Part 2: RBAC Explained

So previously we had a vanilla installation of Apache Ignite on Kubernetes.

You had a cache service running however all you did was installing a helm chart.
In this blog we shall evaluate what is installed and take notes for our futures helm charts.

The first step would be to view the helm chart.

> helm list
NAME        	NAMESPACE	REVISION	UPDATED                             	STATUS  	CHART       	APP VERSION
ignite-cache	default  	1       	2020-03-07 22:23:49.918924 +0000 UTC	deployed	ignite-1.0.1	2.7.6

Now let’s download it

> helm fetch stable/ignite
> tar xvf ignite-1.0.1.tgz
> cd ignite/; ls -R
Chart.yaml	README.md	templates	values.yaml

./templates:
NOTES.txt			account-role.yaml		persistence-storage-class.yaml	service-account.yaml		svc.yaml
_helpers.tpl			configmap.yaml			role-binding.yaml		stateful-set.yaml		wal-storage-class.yaml

Reading through the template files is a bit challenging (well they are tempaltes :P) so we shall just check what was installed through our previous blog.

Let’s get started with the account-role. The cluster role that ignite shall use needs to be able to get/list/watch the pods and the endpoints. It makes sense since there is a need for discovery between the nodes.

> kubectl get ClusterRole ignite-cache -o yaml
kind: ClusterRole
metadata:
  creationTimestamp: 2020-03-07T22:23:50Z
  name: ignite-cache
  resourceVersion: "137525"
  selfLink: /apis/rbac.authorization.k8s.io/v1/clusterroles/ignite-cache
  uid: 0cad0689-2f94-4b74-87bc-b468e2ac78ae
rules:
- apiGroups:
  - ""
  resources:
  - pods
  - endpoints
  verbs:
  - get
  - list
  - watch

In order to use this role you need a service account. A service account is create with a token.

> kubectl get serviceaccount ignite-cache -o yaml
apiVersion: v1
kind: ServiceAccount
metadata:
  creationTimestamp: 2020-03-07T22:23:50Z
  name: ignite-cache
  namespace: default
  resourceVersion: "137524"
  selfLink: /api/v1/namespaces/default/serviceaccounts/ignite-cache
  uid: 7aab67e5-04db-41a8-b73d-e76e34ca1d8e
secrets:
- name: ignite-cache-token-8rln4

Then we have the role binding. We have a new service account called the ignite-cache which has the role ignite-cache.

> kubectl get ClusterRoleBinding ignite-cache -o yaml
apiVersion: rbac.authorization.k8s.io/v1
kind: ClusterRoleBinding
metadata:
  creationTimestamp: 2020-03-07T22:23:50Z
  name: ignite-cache
  resourceVersion: "137526"
  selfLink: /apis/rbac.authorization.k8s.io/v1/clusterrolebindings/ignite-cache
  uid: 1e180bd1-567f-4979-a278-ba2e420ed482
roleRef:
  apiGroup: rbac.authorization.k8s.io
  kind: ClusterRole
  name: ignite-cache
subjects:
- kind: ServiceAccount
  name: ignite-cache
  namespace: default

It is important for you ignite workloads to use this service account and its token. By doing so they have the permissions to discover the other nodes in your cluster.

The next blog focuses on the configuration.