Set up Jenkins for Android projects

Nowadays continuous integration is a must for Android application development.
Jenkins plugins make it a lot easier to go with continuous integration while developing your Android application.

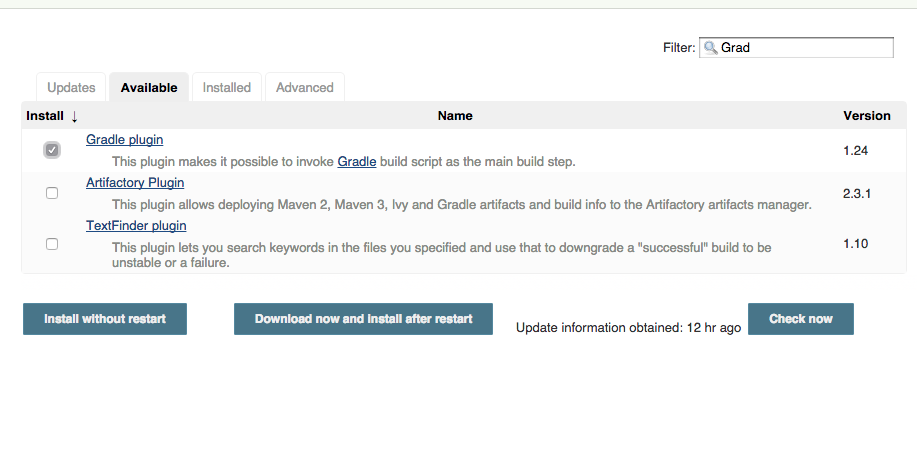
First we must install the Gradle plugin for Jenkins.

GradlePlugin

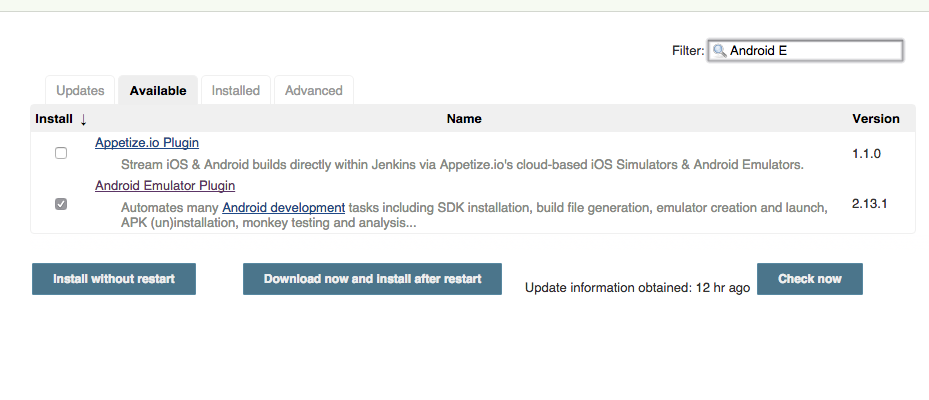
The we must install the Android emulator plugin for Jenkins.

Android emulator

We have to install Gradle on jenkins

wget https://services.gradle.org/distributions/gradle-2.5-bin.zip
unzip gradle-2.5-bin.zip
mv gradle-2.5 /var/lib/jenkins/tools/

Then we configure the gradle plugin

Gradle configuration

Next we install the android sdk

tar -xvf android-sdk_r24.3.3-linux.tgz
mv android-sdk-linux /var/lib/jenkins/tools
cd /var/lib/jenkins/tools/android-sdk-linux/
./tools/android update sdk --no-ui

Then we configure the android plugin

Screen Shot 2015-08-16 at 3.07.08 PM

Then we need to install the following libraries since we are provided with a 32 bit adb. (This works command for ubuntu)

sudo apt-get install libc6-i386 lib32gcc1 libncurses5:i386 libstdc++6:i386 zlib1g:i386

Before proceeding it is wise to ignore from your revision system the local.properties file.
if you use git you should put it on .gitingore

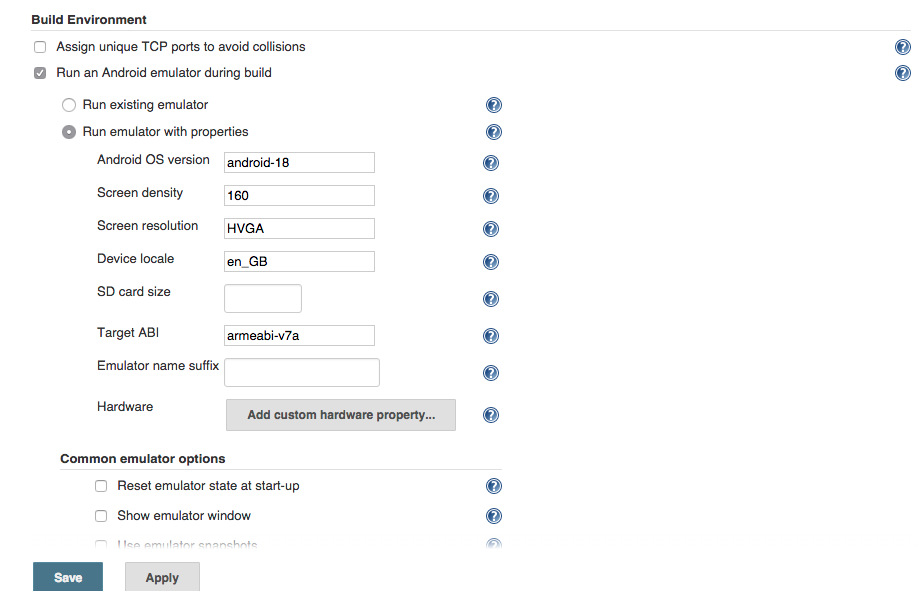
On our new build plan we add the build environment.

Screen Shot 2015-08-16 at 4.45.16 PM

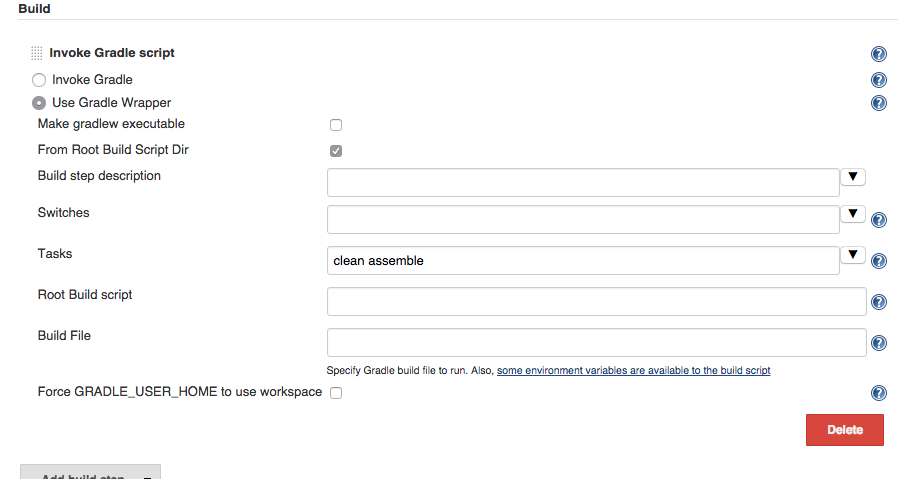
Then we add a Gradle command

Screen Shot 2015-08-16 at 4.46.13 PM

In case our build.gradle has a buildtoolsversion not available on the jenkins side your need to use the android binary inside the sdk to download the build tool version needed.
For example

./android update sdk -u -a -t {build tools package number}

Our android plan is ready.

To sum up it is not as painful as we might think however extra care needs to be given considering the android sdk installation and the build tools.
Set up Jenkins for Node.js

Jenkis is a great ci server with many options and plugins.
With a bit of time and configuration we can use Jenkins for our Node.js applications.

First of all the Node.js plugin on Jenkins enables us to run node.js scripts as a build step.

Screen Shot 2015-06-20 at 3.10.17 PM

In order to proceeed executing various node.js tasks we can use shell build step.

The next step is to install packages using npm

Screen Shot 2015-06-20 at 3.16.59 PM

The next problem is how to keep our application up and running.

To achieve this we can use forever.

Just add the latest version as a dependency inside your package.json

"dependencies": {
"forever": "0.14.1"
}

Then in the same build step we should stop any already running applications.

./node_modules/forever/bin/forever stopall

And by calling forever with BUILD_ID=dontKillMe in front of it we will ensure that Jenkins would not kill our node.js process running, which is most probably an application listening to a port.

BUILD_ID=dontKillMe ./node_modules/forever/bin/forever start bin/www


Screen Shot 2015-06-20 at 3.23.46 PM

For unit testing I prefer theĀ mocha framework.
xunit-file is a great plugin that will transform the results of mocha into a JUnit result file. Therefore we will add the mocha and xunit-file dependencies.

"dependencies": {
"mocha": "~2.2.4",
"xunit-file":"0.0.6"
}

As a build step we should setup

./node_modules/.bin/mocha --recursive --reporter xunit-file


Screen Shot 2015-06-20 at 3.31.53 PM 1

The xunit file produced on the workspace would be used from Jenkins in order to produce a JUnit report.

Therefore we should add a post build action to Jenkins that will publish the JUnit results.

Screen Shot 2015-06-20 at 3.33.31 PM